|
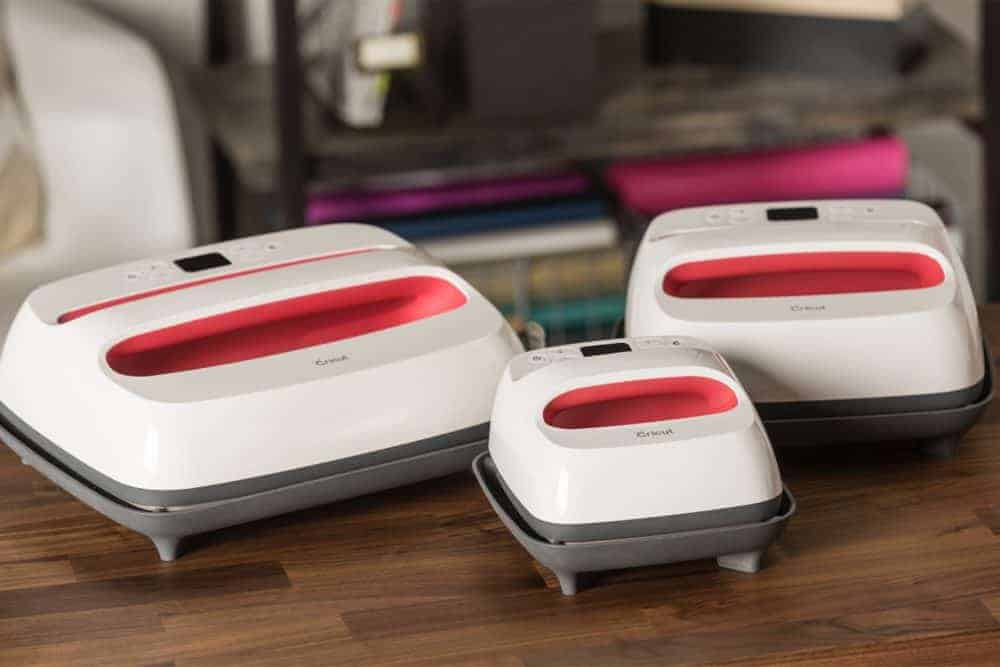
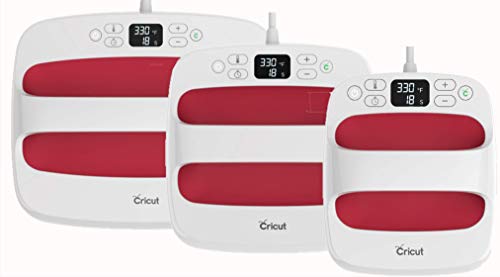
We love the new upgraded EasyPress machines from Cricut. These heat press machines are now available in 3 brilliant sizes, which is great!
But, with options, often comes a little bit of anxiety. Readers are sending us their questions and one of the most common ones are – which size is the right size for me!? So this post is here to help guide you and hopefully, by the end of this post, you will know with confidence which size you should purchase.
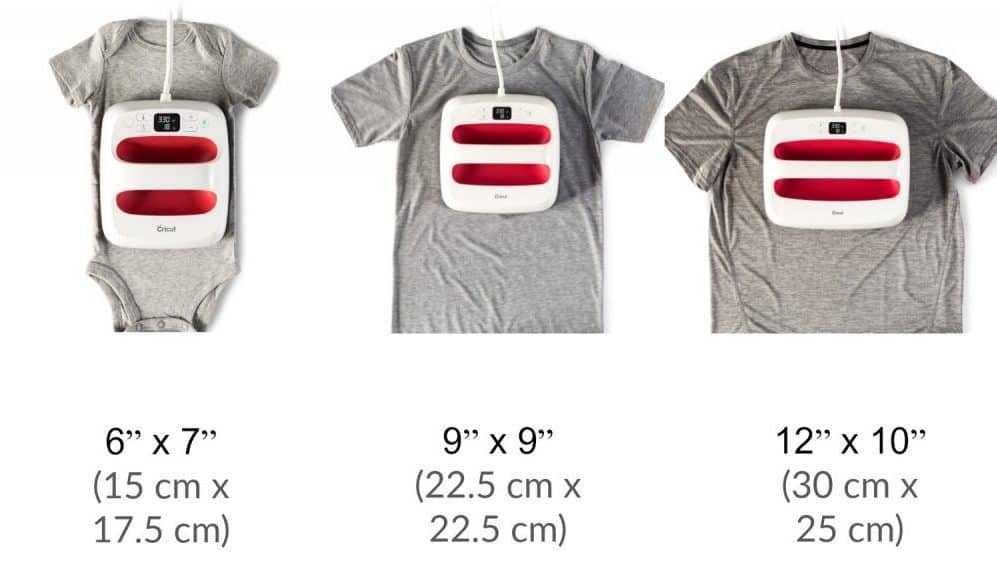
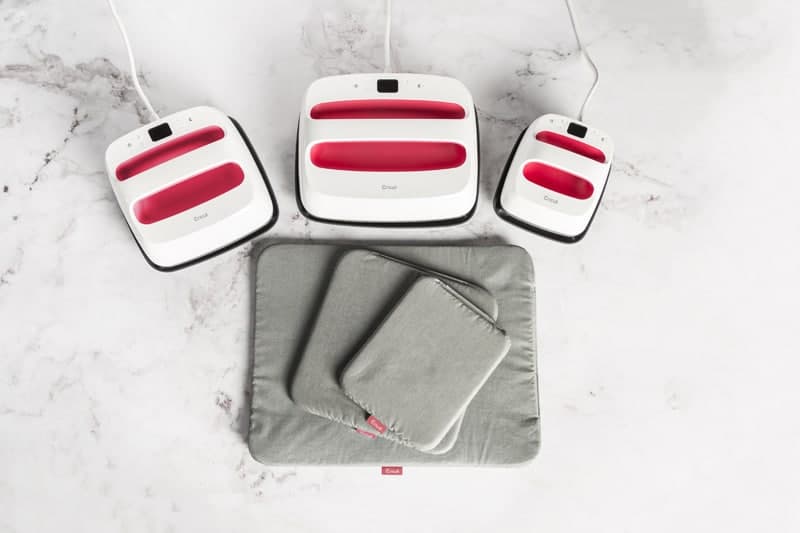
Which Size EasyPress is Best for What Project?Ok, let’s take a look at the different EasyPress 2 sizes. We will also have a look at what type of projects you can make with each of these presses. But first, we loved this picture from Cricut as it does a great job of sizing up the heat presses against some clothing.
– 1. The Smallest of them all: EasyPress 6″ x 7″ (15 cm x 17.5 cm)
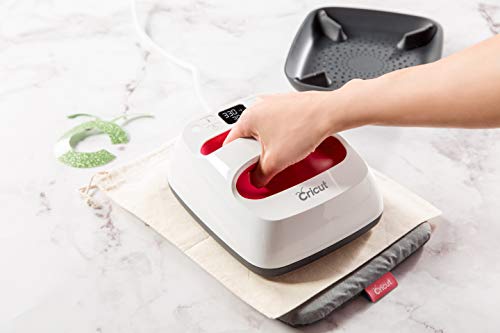
The press is fabulous for when you want to work on smaller projects and we also love using this size when we work with apparel that has tricky seams.
We suggest you use this small press when you work on projects such as:
– 2. The Middle Size: EasyPress 9″ x 9″ (22.5 cm x 22.5 cm)
Here is a list of some great projects that are a good fit for this medium-size press:
– 3. The Large Press: EasyPress 12″ x 10″ (30 cm x 25 cm)
This press is ideal for you if you love working on the following projects:
Now we have had a look at the type of projects that suits each type of press, but did you know that buying the largest size might not be the right move either? Don’t buy a press that is too small. But don’t buy one that is too large. Clear as mud? Yeah, I suppose so. But think about it this way. If you buy a press that is too small for your project, you will have to apply multiple presses over the transfer. This can lead to fading the transfer in some areas because you will be over-pressing some parts of the design. If you buy a press that is too large, you will find that it will be tricky and awkward to work on small parts of your project. You might find that you struggle to apply heat evenly, as things like pocket, buttons, and seams will interfere with the application. The trick is to find the press that is just right for you! So really have a good think about what type of projects you will be working on the most and choose the press that is right for that!
Further Reading:
I would love to know which size you settled on. Please let us know in the comments below. The post Which Cricut EasyPress 2 Size Should You Buy? is courtesy of: Blog: The Best Vinyl Cutters via WordPress https://cuttercraftsbysamantha.wordpress.com/2018/11/14/which-cricut-easypress-2-size-should-you-buy/
0 Comments
Chasing ideas of what you can make with your Cricut? So you love your Cricut machine, but after a while ideas dwindle down and whilst you itch to make something, you just don’t know what you want to make next. This is where our Cricut Project round-up post comes into play. We asked all our favorite Cricut craft bloggers to share their favorite Cricut Projects with us. And we have been truly impressed with all of the creative ideas that came out of this collaboration. From earrings, to quilts, to DIY signs, felt flowers, cord keepers and so much more. We hope that these beautiful Cricut Project crafts will help inspire you to get back behind that craft table and get creating.
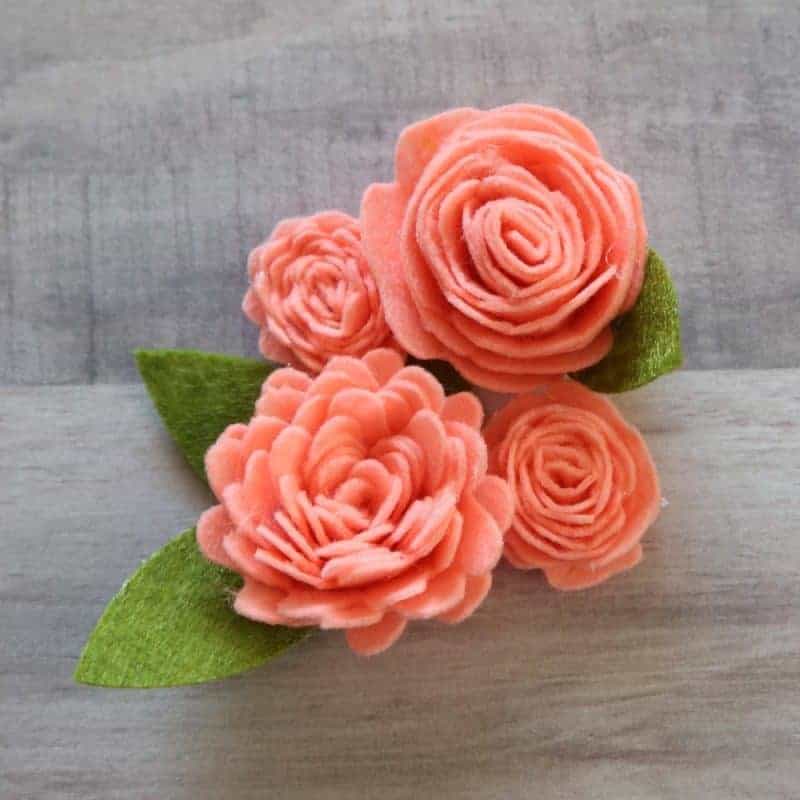
Cricut Project IdeasWe wanted to round up some beautiful inspirational Cricut Projects from around the web, to show you what you can make with the help of a Cricut Machine. 1. Create beautiful DIY felt flowers with your Cricut
Michelle from Weekend Craft shows us how to create these beautiful felt flowers. I love the texture and dimension of these beautiful flowers. Hop over to see her great tutorial as she walks you through the steps of using Cricut Machine together with some Cricut felt in order to whip up these sweet blooms. 2. DIY Monogrammed Leather Cord Keepers
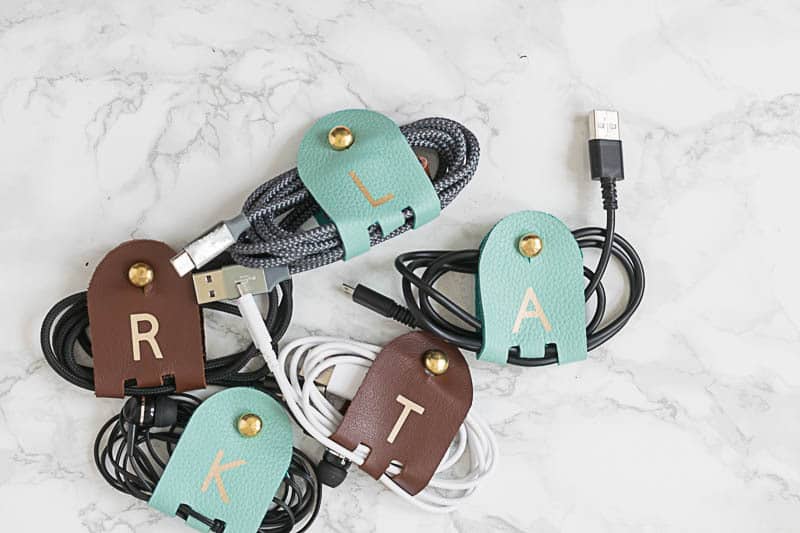
What a super nifty idea by Lynn from Nourish and Nestle. If you love traveling like me, you will know what a headache it can be to keep cords organized. This is a brilliant way to not only keep them tidy, but to make it super easy to identify which cable belongs to which member of the family! You can click here to get the full tutorial. 3. DIY Earrings
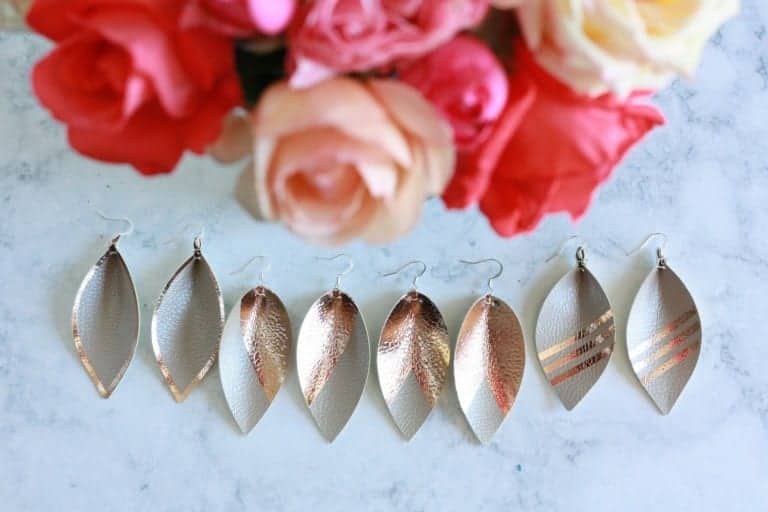
Why buy earrings, when you can make some unique pieces! These would make fabulous gifts as well. Jenny from Everyday Jenny shares her steps to help you create these DIY faux leather earrings. Make sure to have your Cricut cutter, Cricut Faux Leather Pebbled, some foil iron-on in rose gold, and earring hooks on hand. 4. Create your Own Custom Tee
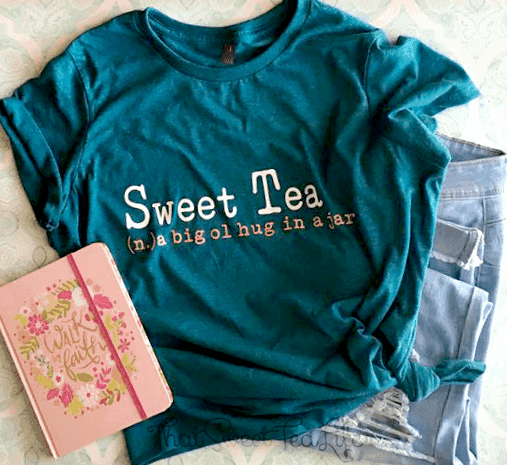
Now we all know that we can make custom tee’s with our Cricut machine right!? I think it is one of the most things you can possibly do, not to mention one of the most rewarding. If you haven’t dipped your fingers into the art of custom t-shirts yet, hop over to this fabulous tutorial from Thea at That Sweat Tea Life! 5. Make your Own Sticker Planner Sheets
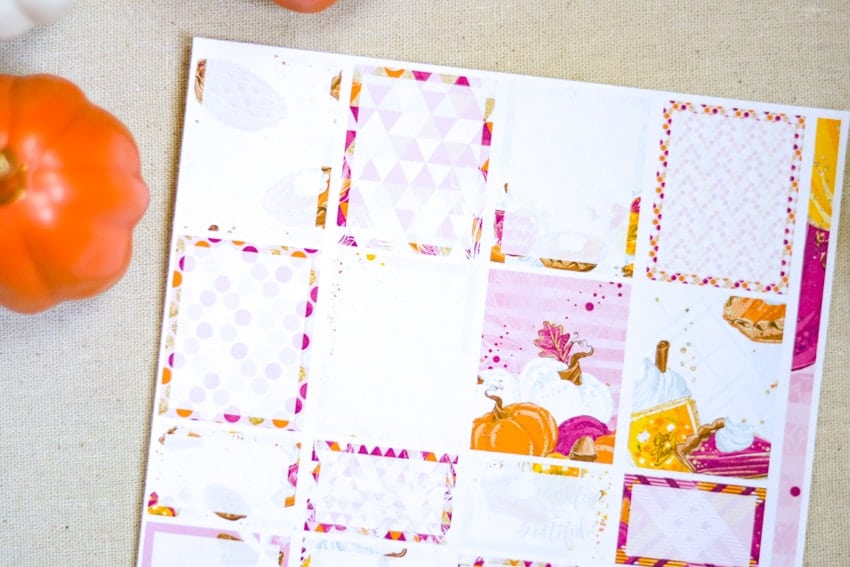
Here is a lovely super quick and easy Cricut project for you all. Super easy because the lovely Alex from Three Little Ferns actually includes this sticker PDF sheet in her tutorial. So all you have to do is download, upload and create! Hop over here to find her sticker sheet as well as some instructions on how to whip up your own planner stickers. 6. Make your own Wooden Bookmark
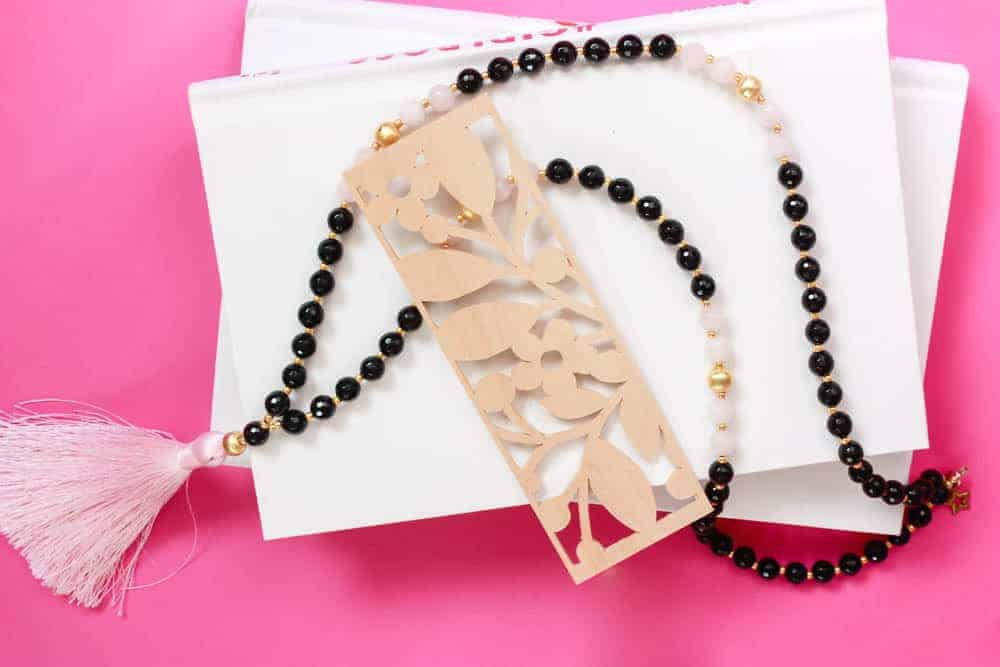
Amber from Amber Oliver shares her tutorial on how to whip up this stunning wooden bookmark. What a brilliant gift for yourself or for anyone you know that loves reading books. She used the Cricut Maker together with the knife blade in order to cut this intricate bookmark out of wood. I loved all the helpful tips that she shares about what to expect as you work on a medium such as wood. Hop over and have a read! 7. Make your own Quilt
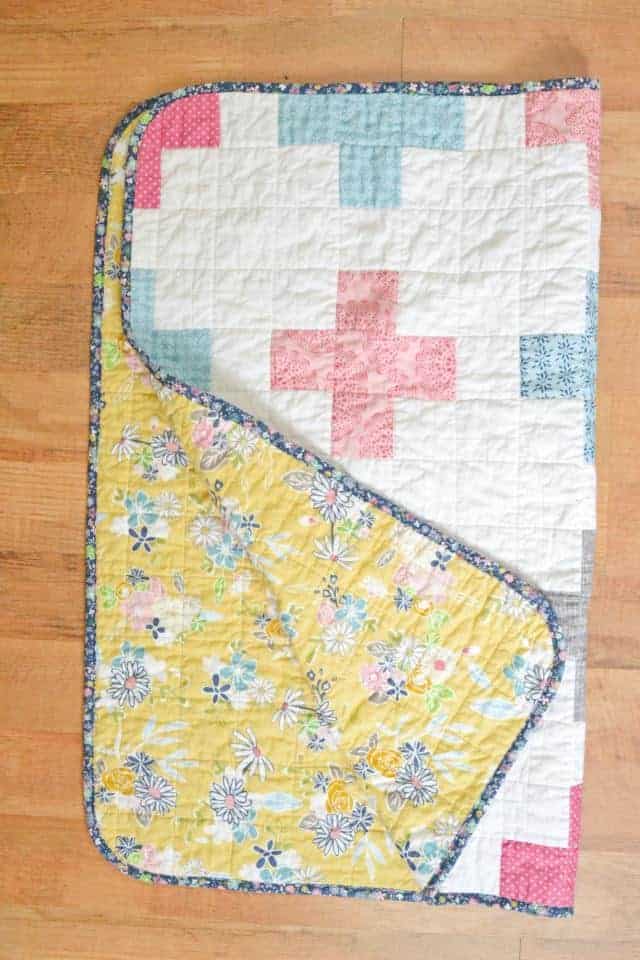
How many of you are aware of the fact that the Cricut Maker is the perfect machine to cut fabric. It also includes loads of sewing patterns as well. It doesn’t get easier than that! Heather from Heather Handmade walks us through the whole process of what you need to do in order to create this stunning quilt. Note: You will need to have a Cricut Maker in order to follow along. 8. Make your own Take-Out Boxes
Kim from Today’s Creative Life has a brilliant tutorial for you. She shows you how to make your own take-out boxes – brilliant for so many different things, from party boxes, to gift boxes, to wedding favor boxes and more! Her tutorial is centered around learning how to use the Cricut scoring wheel, so not only do you learn to create a box with your Cricut machine, but you also get to learn how to use the scoring wheel as well. 9. Make a Custom Address Plaque
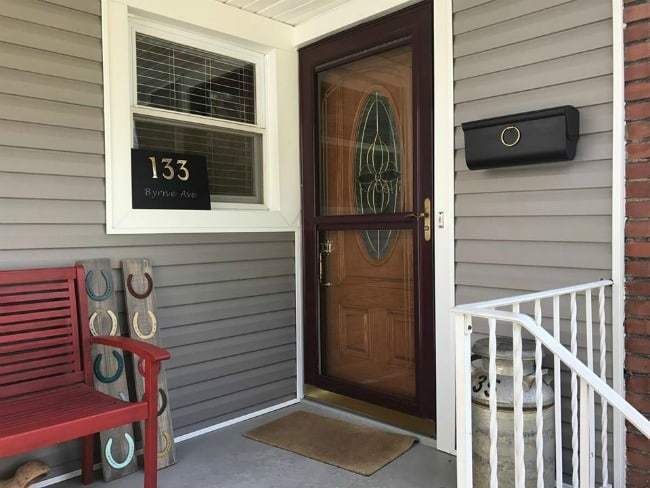
Want to make the entrance to your home a bit more personal? Kandice from Just the Woods shows us how to create this beautiful custom address plaque in only 6 steps. You will need a scrap piece of wood, some metal numbers, some foam pouncers and of course your trusty Cricut machine. 10. DIY Learn How to Tie your Shoes
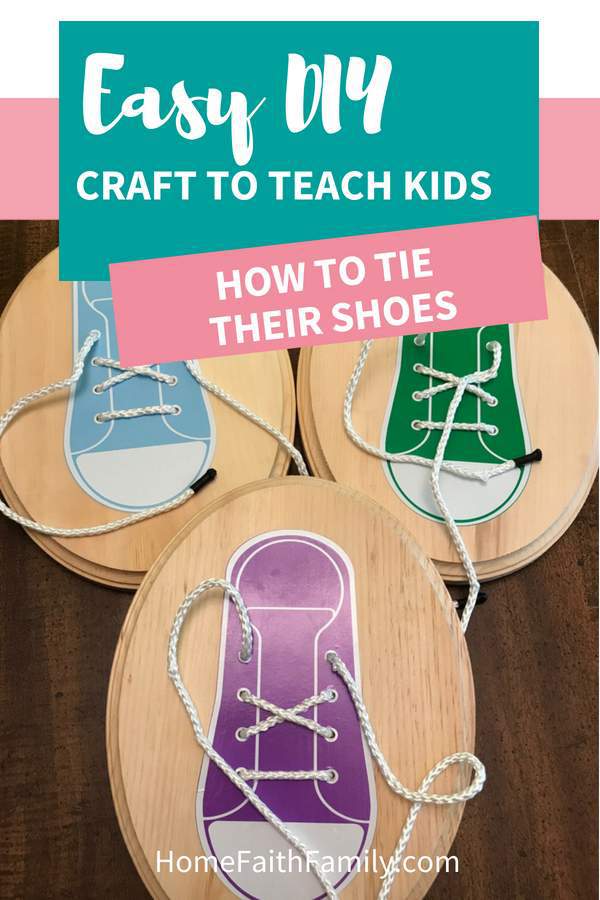
For our last Cricut project idea, we wanted to share this incredibly brilliant DIY. Micah from Home, Faith, Family shows us how to create these clever “learn how to tie shoelaces” project. I have a daughter who is currently struggling with this kill, which is probably why I’m so excited about it! So clever. If you have young kids, this is a must-do!
Popular Cricut Posts and Guides from our Blog:
Wondering What you Can Make with the Cricut? 10 Cricut Projects Ideas! was first published to: The Best Vinyl Cutters via WordPress https://cuttercraftsbysamantha.wordpress.com/2018/11/13/wondering-what-you-can-make-with-the-cricut-10-cricut-projects-ideas/ We get so excited by bundle deals! They are always brilliant value and typically include lots of fun additional extras at a very low additional cost. The Cricut Maker Bundle Deals listed below have all been very carefully curated with a host of tools and accessories that would be helpful for a variety of crafters. The Maker Cricut bundles are a great way to save the money! You can also see how this cutter compares to other fabric cutting machines here. >>>Click Here to See Prices for the Best Maker Bundle Deal ____________________________________ Table of Comparison of the Best Cricut Maker Bundle DealsPlease scroll to the right if you are on mobile.
Wondering Which Cricut Bundle to Buy?Not convinced that a bundle deal is a right choice for you? Maybe these questions and answers will help, also feel free to leave us questions in the comment section below the post.
1. Who is the Cricut Maker bundles best suited for?Bundle deals are perfect for first-time machine purchasers. Typically beginners and newbies find bundle deals to be the most value as it includes everything that they could possibly need to get started on a project. 2. The machine-only vs a bundle dealYou will be surprised how often you can find a bundle deal for exactly the same price as a machine-only price (when they are on sale). The only way to compare is to make sure that you know how much the machine-only will cost you. Find the latest machine-only price from Amazon below: [tcb-script type=”text/javascript”]amzn_assoc_placement = “adunit0”;amzn_assoc_tracking_id = “bestvinylmachines-20”;amzn_assoc_ad_mode = “manual”;amzn_assoc_ad_type = “smart”;amzn_assoc_marketplace = “amazon”;amzn_assoc_region = “US”;amzn_assoc_asins = “B072VYPWM4,B076J1JCCT”;amzn_assoc_design = “in_content”;[/tcb-script][tcb-script src=”//z-na.amazon-adsystem.com/widgets/onejs?MarketPlace=US”][/tcb-script] 3. Which bundle should you buy?The bundle deals have been curated to suit various types of crafters. We have four different types of bundles – 1 of which is a great ‘taste-tester’ bundle, one which is suited for those who love working with fabric and one for those who love working with vinyl. Before you purchase a bundle, ask yourself why you want to purchase this machine – what will you be making? 4. Where can I learn more about the machine?
Not sure if this is the machine for you? Then I suggest you go and read through our comprehensive Cricut Maker Review. You can also get some inspiration on what fabric projects to make with the Cricut Maker here. ____________________________________ The Best Cricut Maker Bundle Value DealsThe Cricut Maker is one of our favorite machines. It is the latest release from Cricut and it is one of our best selling machines. Find below a list of the most popular Cricut Maker Bundle Deals. All great value and all worth the investment.
1. Cricut Maker Everything BundleBEST SELLER BUNDLE
Who is this bundle best suited for?The Cricut Maker Everything Bundle is perfect for those who want to enjoy a sampling of everything the Maker can do. The package includes a bit of everything, so that you can try out a wide range of crafts – which is a brilliant way to discover what the machine is capable of. It is also a great way to figure out what exactly you love creating! What is Included in this Bundle?
This is our favorite bundle and a great choice if you want to get started with the Maker. 2. Cricut Maker Essentials BundlePERFECT BUNDLE FOR FABRIC CRAFTS
Who is this bundle best suited for?The Cricut Maker Essentials Bundle is perfect for those who love working with fabric. Essentially this package contains all the bits and pieces that you might need to start cutting fabric with this machine. What is Included in this Bundle?
3. Cricut Maker Vinyl BundlePERFECT BUNDLE FOR VINYL CRAFTS [easyazon_image align=”center” cart=”n” cloak=”n” height=”500″ identifier=”B076J1JCCT” locale=”US” localize=”y” nw=”y” nf=”y” src=”https://www.thebestvinylcutters.com/wp-content/uploads/2018/11/51phxIU3HCL-1.jpg” tag=”bestvinylmachines-20″ width=”500″]
Who is this bundle best suited for?The Cricut Maker Vinyl Bundle is perfect for those who love working with vinyl. Essentially this package contains all the bits and pieces that you might need to start creating vinyl images, transfers and decals. What is Included in this Bundle?
4. Cricut Maker Deluxe Vinyl & Heat Transfer BundlePERFECT BUNDLE FOR VINYL CRAFTS
Who is this bundle best suited for?The Cricut Maker Deluxe Vinyl Bundle is perfect for those who love working with vinyl and heat transfer. It is an advanced bundle and ideally suited for those who already have established that they are crazy about vinyl & heat transfer crafts! What is Included in this Bundle?
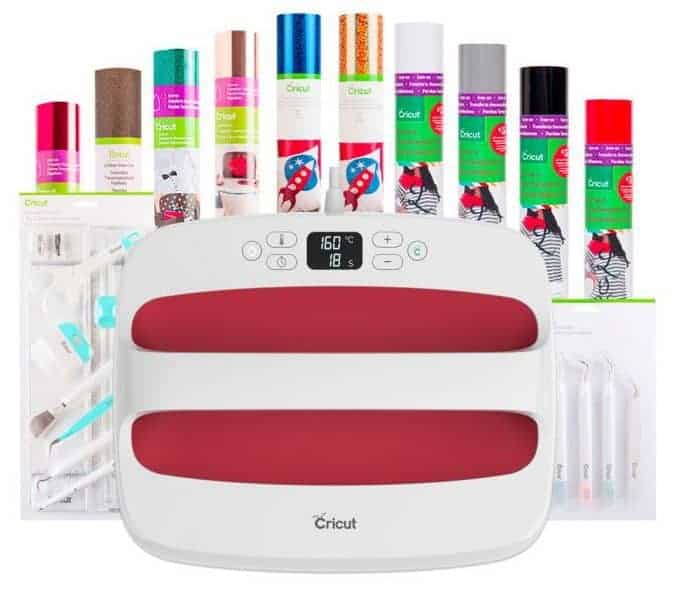
We hope you found our list of the absolute top Cricut Maker bundle deals helpful. Bundle deals are great value and always worth the investment. The challenge is to figure out which of the Cricut bundles would be the perfect match for your style of crafting. The following article The Absolute Best Cricut Maker Bundle Deals of 2019! is republished from: thebestvinylcutters.com via WordPress https://cuttercraftsbysamantha.wordpress.com/2018/11/13/the-absolute-best-cricut-maker-bundle-deals-of-2019/ We get so excited by bundle deals! They are always brilliant value and typically include lots of fun additional extras at a very low additional cost. The Cricut EasyPress 2 Bundle Deals listed below have all been very carefully curated with a host of tools and accessories that would be helpful for a variety of crafters. What you need to remember is that if you are getting started with pressing, you will need to purchase these tools and accessories additionally anyways. It only makes sense to purchase a bundle. You can also see how this heat press compares to other heat press machines here. >>>Click Here to See Prices for the Best EasyPress 2 Bundle Deal ____________________________________ Wondering Which EasyPress Bundle to Buy?Not convinced that a bundle deal is the right choice for you? Maybe these questions and answers will help, also feel free to leave us questions in the comment section below the post.
1. Who is the Cricut EasyPress 2 bundles best suited for?Bundle deals are perfect for first-time machine purchasers. Typically beginners and newbies find bundle deals to be the most value as it includes everything that they could possibly need to get started on a project. If you already have a stash of vinyl and a selection of Cricut tools, you might not find the bundle deals as valuable. 2. The machine-only vs bundle dealsYou will be surprised how often you can find a bundle deal for exactly the same price as a machine-only price. The only way to compare is to make sure that you know how much the machine-only will cost you. Find the latest machine-only price from Amazon below: 3. Which bundle should you buy?Currently, there are only two bundles available to choose from – makes it nice and easy. The cheaper bundle mostly has like a ‘tester’ of goodies in it for you to try out. So you can get a feel for the machine and make a few things and figure out which products you enjoy working with the most. The second bundle is really just an extension on the first bundle and really just includes more choices of the same products – so great for those who know that they already love working with vinyl. 4. Where can I learn more about the machine?Not sure if this is the machine for you? Here is a great post to show you what you can make with this great machine! – >>>Click Here to See Prices for the Best EasyPress Bundle Deal ____________________________________ Which Size EasyPress is the Right Size for Me?
Photo Credit: Cricut The EasyPress 2 is available in 3 sizes. It is therefore important for you to figure out which size you would like to purchase before you look at the bundles themselves. Fortunately each bundle is available in each size. 6″ x 7″ EasyPress 2:The smallest of the presses comes in a 15 cm x 17.5 cm size. It is a nice and lightweight press and weighs only 3.3 lbs (1.5 kg). This press is perfect for you if you plan on working on:
9″ x 9″ EasyPress 2:The middle size press comes in a 22.5 cm x 22.5cm size. It is still pretty portable and weighs only 5.73 lbs (2.6 kg). This press is perfect for you if you plan on working on:
10″ x 12″ EasyPress 2:The largest press comes in a 30 cm x 25cm size. It weighs 8.6 lbs (3.9 kg). This press is perfect for you if you plan on working on:
So big question, comes down to – what do you plan on making with your heat press? The Best Cricut EasyPress 2 Bundle DealsEveryone is talking about the new upgraded EasyPress. Now even better in design and available in 3 sizes – all at an affordable price!! Find below a list of the most popular EasyPress 2 Bundle Deals.
1. Cricut EasyPress 2 Everything BundleBEST SELLER BUNDLE
Who is this bundle best suited for?The Everything Bundle is perfect for those who really just want to have everything that you could possibly need to start creating with your new ‘toy’. Let’s face it, it is better to have enough stash to keep us busy for a while. If you have to go back in a week to buy more vinyl or tools, you will waste money on postage. We love this bundle. What is Included in this Bundle?
This is our favorite bundle and the one we recommend you invest in. 2. Cricut EasyPress 2 Essentials BundleBEST SELLER BUNDLE
Who is this bundle best suited for?Not sure how often you will pull out the EasyPress? Of maybe you know that you will only really occasionally use the EasyPress. If this sound like you, then the Essentials bundle is for you. It is really a starter bundle … or a taste tester bundle. To try out a few different types of vinyl and to just get your fingers wet. What is Included in this Bundle?
We hope you found our list of the absolute top EasyPress bundle deals helpful. Bundle deals are great value and always worth the investment. The challenge is to figure out which of the Cricut bundles would be the perfect match for your style of crafting. The Absolute Best Cricut EasyPress 2 Bundle Deals of 2019! is available on: https://thebestvinylcutters.com/ via WordPress https://cuttercraftsbysamantha.wordpress.com/2018/11/12/the-absolute-best-cricut-easypress-2-bundle-deals-of-2019/ Let me guess, you have purchased a Cricut Machine, and now you are wondering what the Design Space and Cricut Membership is all about?
Maybe you know what the Design Space is about, but even though the subscription service is pretty cheap, you want to understand exactly how it works, what you will get and why it is worth every single dollar. So let’s get down to answering all of your questions. Here is everything you possibly wanted to know about the new Cricut Design Space Subscription.
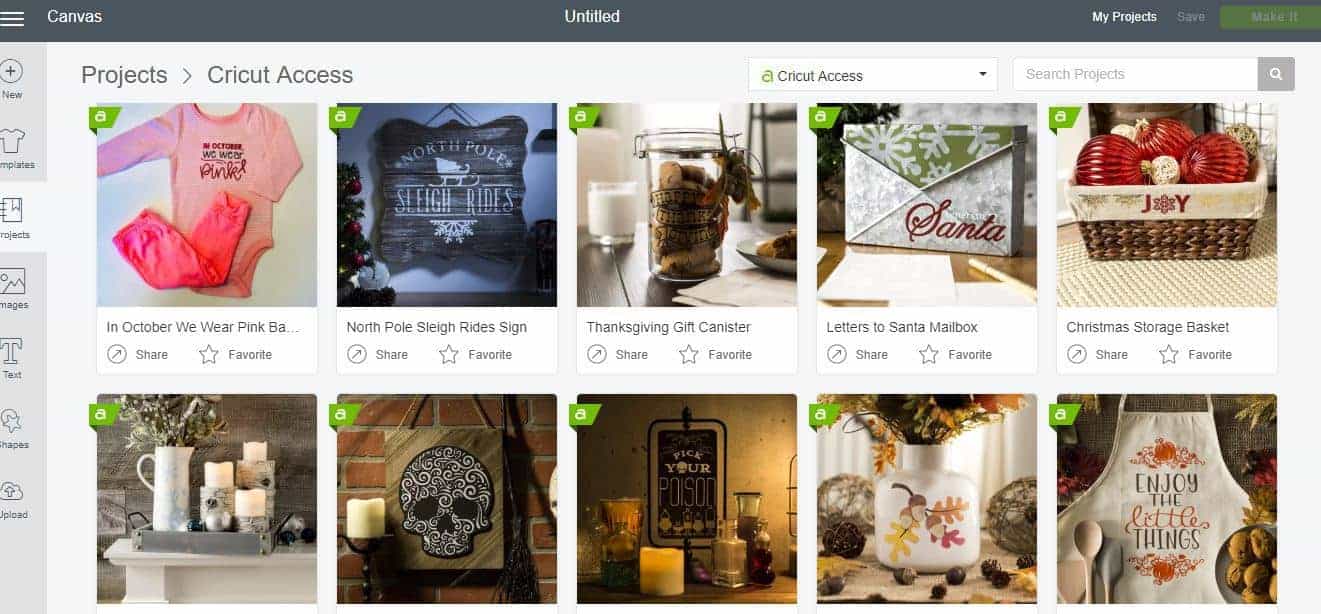
What is the New Cricut Design Space?The Cricut Design Center is your one-stop shop for all your inspiration and creation needs. Ultimately the Cricut Design Space is an easy-to-use web-based program that lets you browse predesigned projects. You can also design your own projects as well.
What is so magical about the Cricut Design Space?
Can you use Cricut Design Space without a Subscription?Okay so that all sounds pretty cool right, but the burning question is: do you have to pay for Cricut Design Space? No, you don’t have to pay for the design space. You can go to www.cricut.com/design right now and create your account. Go on, sign up – I’ll wait for you!
Click -> www.cricut.com/design Enter your details, choose a password and you are in!
Now you will be able to browse through projects, and you will also have access to some tutorial videos, as well as your canvas where you can design your own projects.
Whilst there are a few free images and projects in the Design Space for you to use, most of the time you will find a Cricut Design Space Cost applicable when you actually choose to use any of their images of when you choose one of their “Make it Now” projects. It will cost you about $1 for every image you choose to use and most likely around $3-7 for each Make It Now project you purchase.
Now you can see how quickly this can add up! But luckily there is this thing call Cricut Access, let’s talk more about that, shall we!
What is Cricut Access?Cricut Access is basically your way of saving money in the long-term. It is a subscription service where you pay a set fee per month and in return, you get access to images, fonts, and Make it Now projects at no additional cost.
So how much is Cricut Design Space on the subscription membership? You can choose from three options:
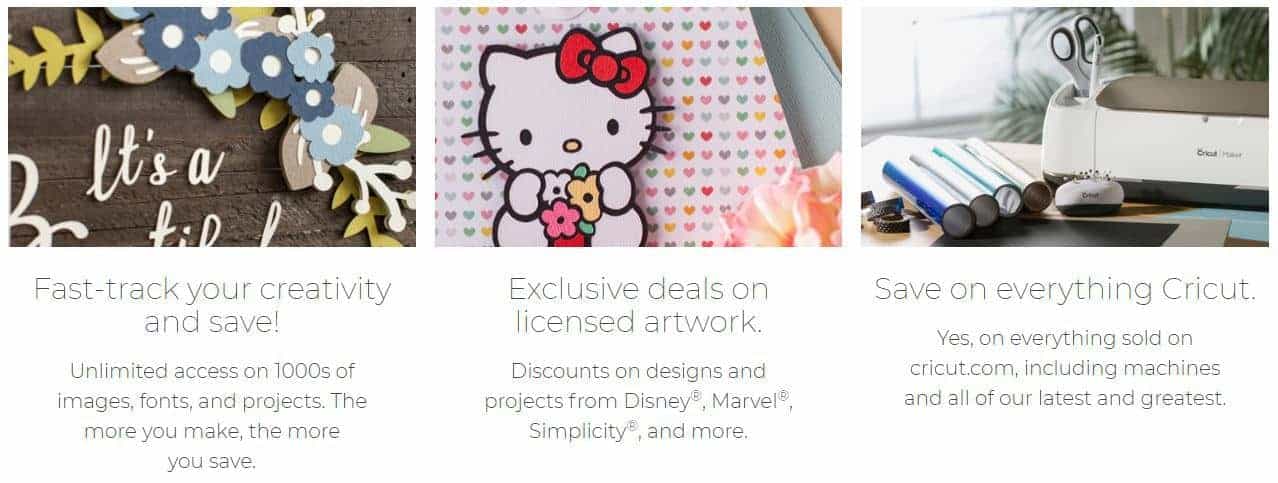
What is Included with my Cricut Subscription? With your all three of your Cricut Memberships you will get access to:
Now if that wasn’t worth the money, maybe these benefits will tie you over:
It is important to note that not every single image, font or project is included in your membership. To make it easy for you, you will easily see which of the images and projects are free as they all have a little green flag on them. But you will find that there is still an additional cost on some items. But don’t get greedy now – remember, you get UNLIMITED access to over 50,000 image, more than 400 fonts and 1000+ projects – that will keep your busy – I promise!!
Introduction to Design SpaceNow before I encourage you to sign up, I thought it might be nice to have a quick look around the Cricut Design Space. Here is the video that Cricut shared when the Design Space came out: They have loads of videos and tutorials to help you around the Design Space.
SIGN ME UP!I’m sure you have seen the value in signing up for the Cricut Membership. So what are you waiting for? Come and join the Cricut club and reap the benefits! The following post New Cricut Design Space & Cricut Access: Should you Subscribe? was first published on: Blog: The Best Vinyl Cutters via WordPress https://cuttercraftsbysamantha.wordpress.com/2018/11/08/new-cricut-design-space-cricut-access-should-you-subscribe/ Did you just make a mistake when you tried to adhere your HTV vinyl with your heat press? Mistakes happy. The beauty if when you can fix mistakes easily and that is where this handy post on how to remove heat transfer vinyl from a shirt comes in. Today we share with you 3 popular ways in which you can remove vinyl from a light or dark shirt.
How to Remove Heat Transfer Vinyl from a ShirtFind below 3 of the best ways to remove vinyl from a shirt. 1. Use a T-Shirt Vinyl Remover SolutionOur preferred method for removing vinyl from a shirt is by using HTV remover solvents. If you are wondering how to remove iron-on letters in an easy and fuss-free manner, then this is our pick for you. Our Preferred Heat Transfer Vinyl RemoverWe have used and love any of the following heat transfer vinyl remover solutions. It simply tends to grab whichever is the cheapest when we make our purchases. 1. AlbaChem 1020 Vinyl Remover for ShirtsOur favorite product is the AlbaChem 1020 Remover. This product is fabulous because not only does it do a great job in stripping the vinyl off, but it also does a fabulous job of removing the adhesive left over as well. This product works great with Siser, Precise, Silhouette, Cricut, Thermoflex, Chemica vinyl. 2. TRW Magic Vinyl RemoverWhenever we can’t find our favorite AlbaChem 1020 Remover, we often look towards the TRW Magic Vinyl Remover.
How to Use a HTV Vinyl Remover1. Tumble dry the shirt at a high temperature for 5 minutes. 2. Whilst the shirt is still hot, turn it inside out. 3. Cover the entire back side of the heat transfer vinyl design with the remover. 4. Stretch the fabric so that the solvent can soak through and loosen the adhesive. 5. Give the solvent a few minutes to work 6. Flip the shirt the right side out and use some tweezers to lift off the vinyl Now, you have managed to remove the vinyl, but it is important to note that the HTV adhesive residue is still on the shirt and we need to remove this as well. 7. Apply more of the remover to the front of the shirt and gently use a white rag to rub away the residue.
2. Use a Hot Iron and TweezersWondering how to remove vinyl heat transfer without the use of chemicals? Another nifty trick is to simply use your iron and some tweezers. Again this might not be the best way to remove the actual adhesive from the vinyl, but it does a really good job of removing the vinyl. How to Remove Vinyl from a Shirt without Chemicals1. Heat up your iron to its max temperature 2. Simply place the hole of the shirt over the iron (as if you were dressing a person). The backside of the vinyl should be snug against the iron (this is where the glue is), whilst the actual vinyl design should be facing away from the iron. 3. Wait for the adhesive to start melting – you will probably be able to smell when this starts to happen. 4. Simply use your tweezers and start loosening the vinyl from the corners and edges. We prefer using the solvent above this method due the fact that you can slightly damage the threads of the shirt whilst you are picking at the vinyl. But this is a nifty trick for when you don’t have a solution on hand and you just want to get on with it. Here is a great video to show you how you can remove the vinyl with an iron:
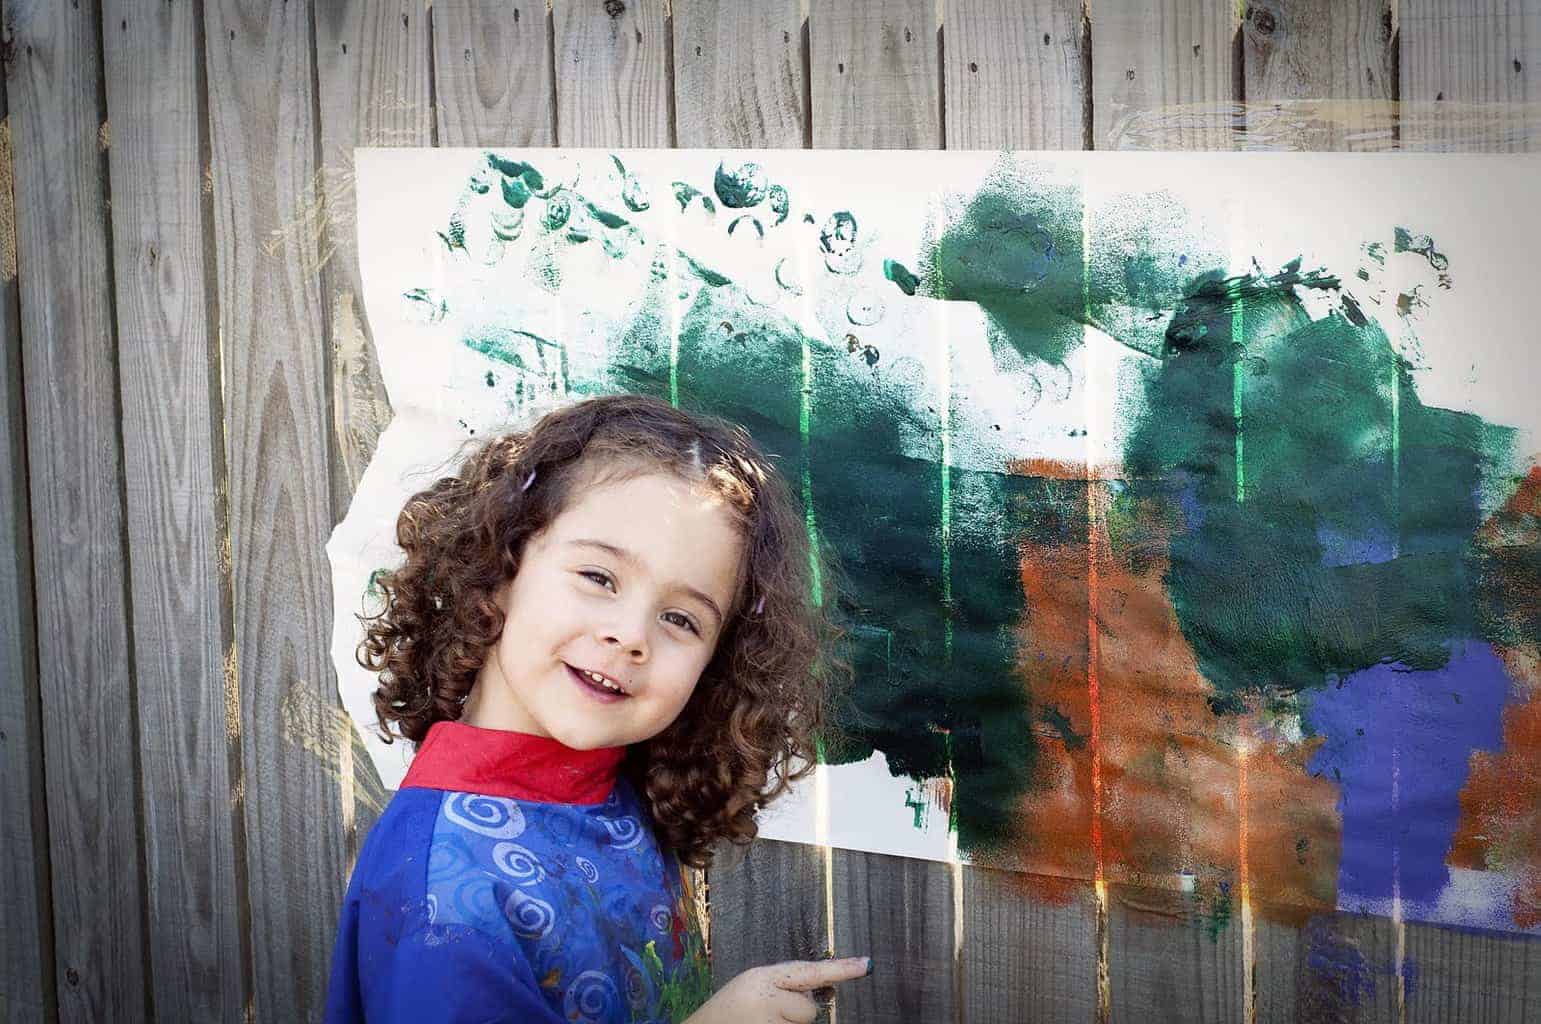
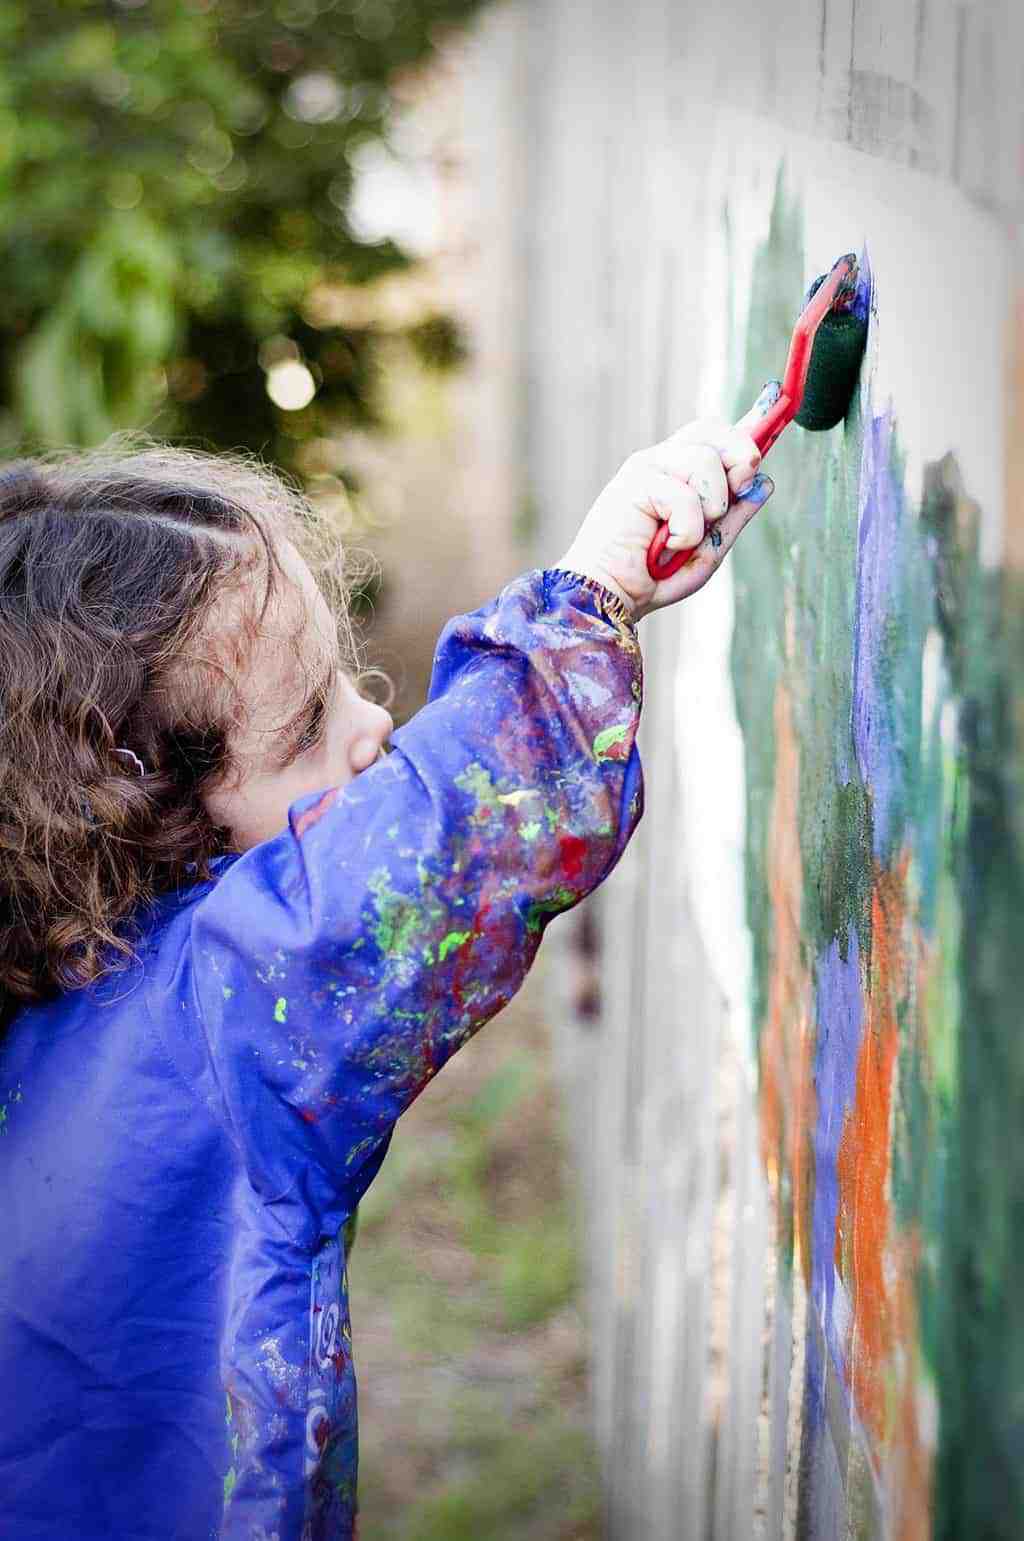
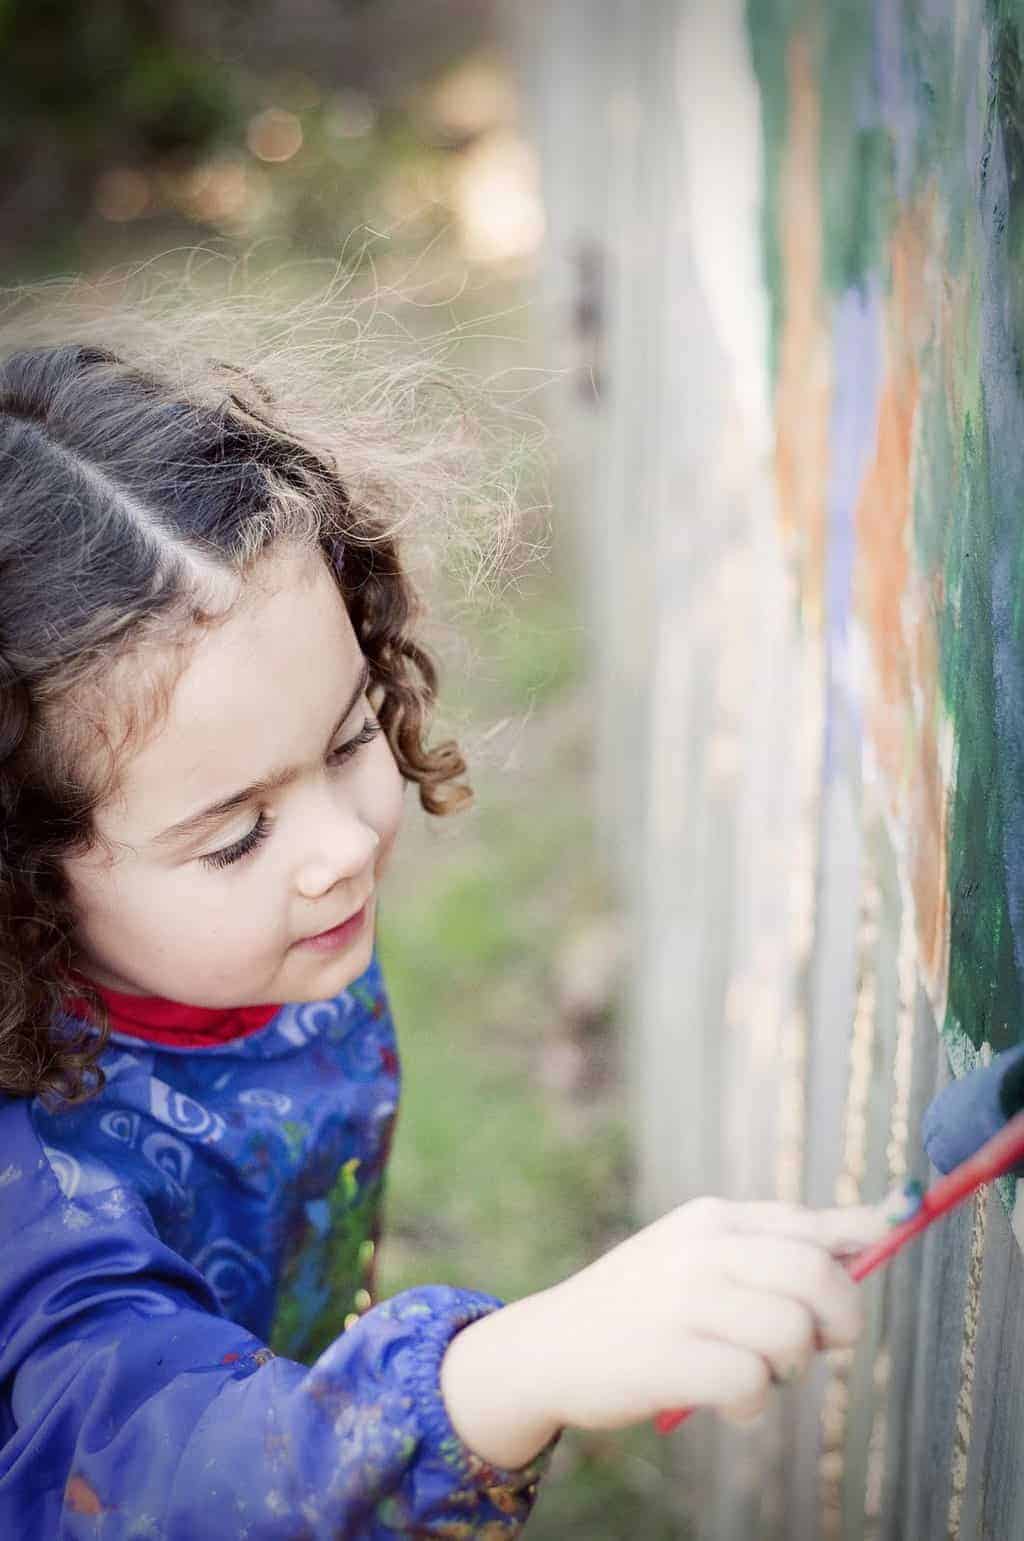
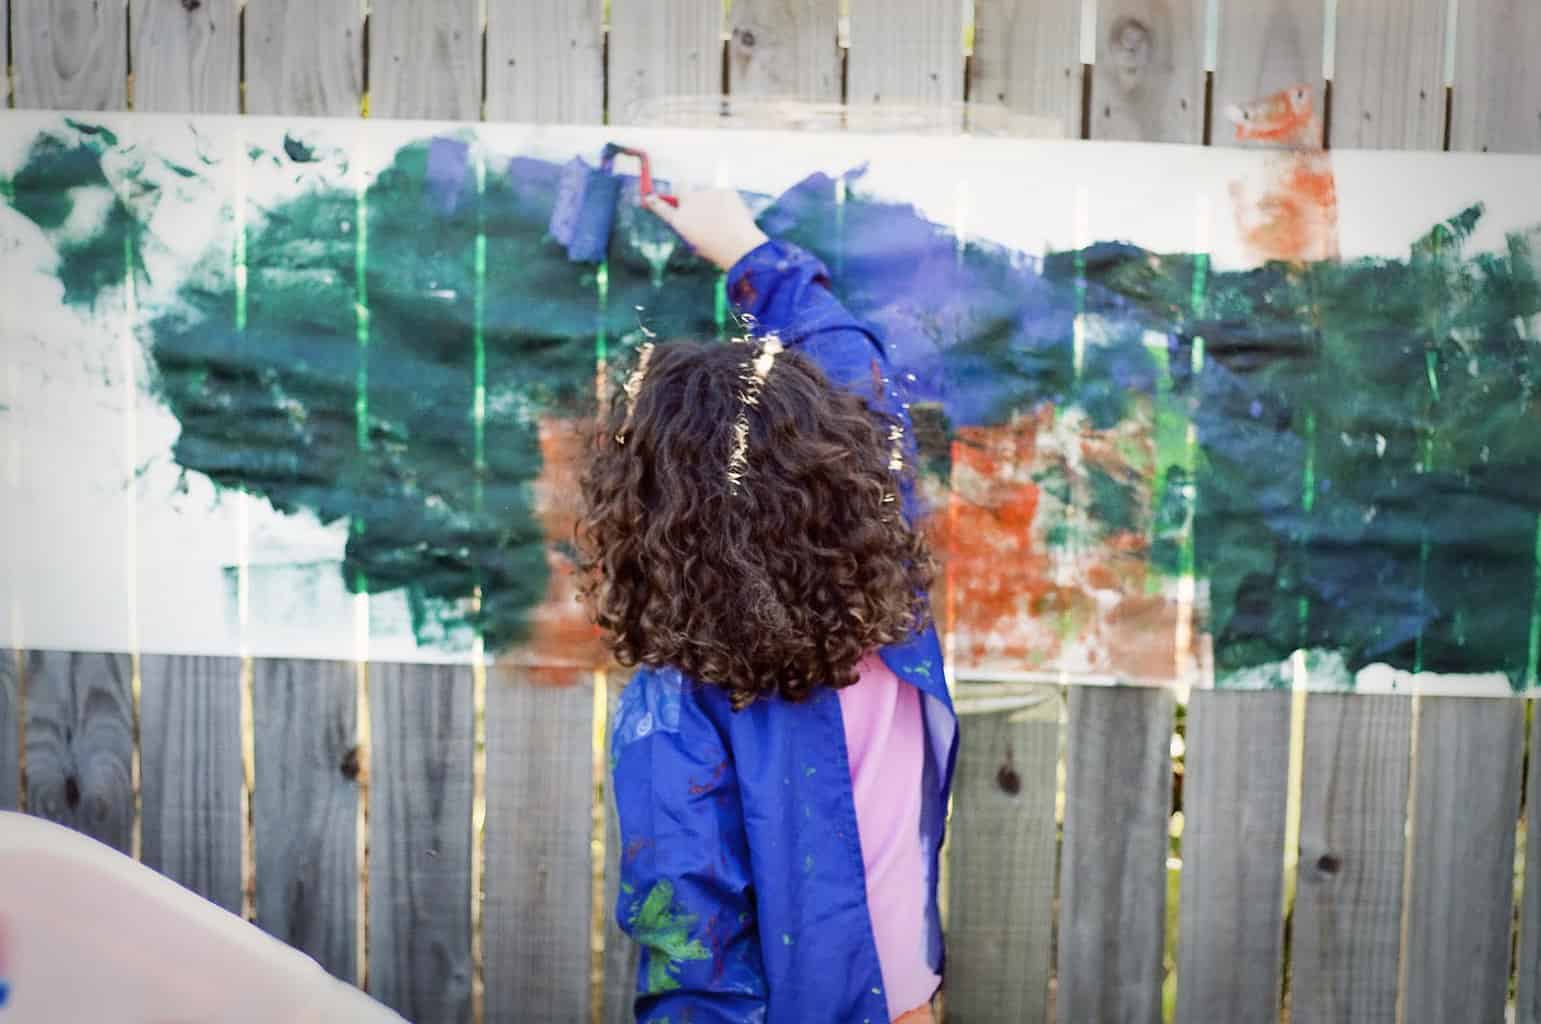
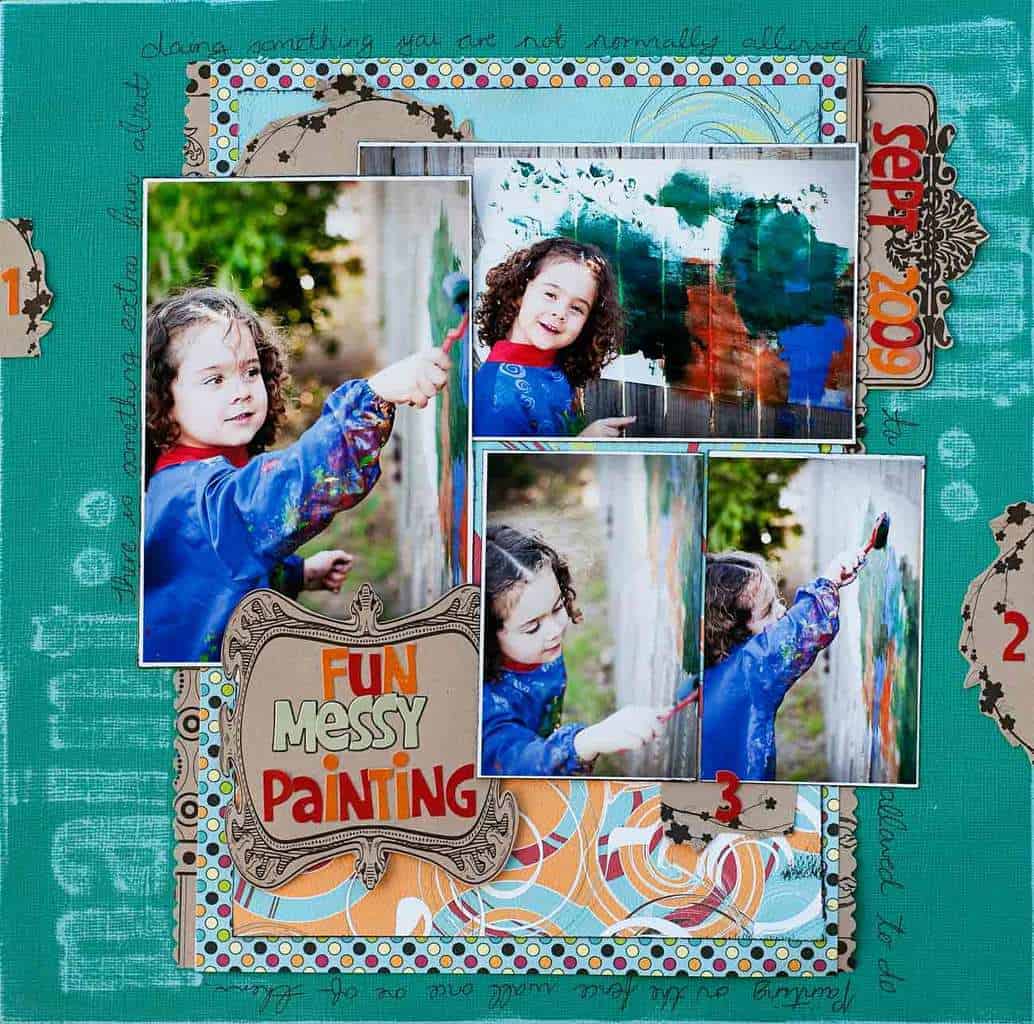
3. Use Heat and SteamAnother way that you can try to remove the vinyl is by using both heat and steam. This doesn’t always work very successfully and often you might find that the adhesive residue stays behind. But it could be worth giving it a go, it works better when there was an error in the application of the vinyl and it never adhered properly in the first place. It is important to read the care instructions of your shirt before you apply heat to it, as not all fabrics react to heat positively. How to Take Off Heat Transfer Vinyl with Heat and Steam1. Lay your shirt on a surface that can handle the heat. We like to use our ironing board. 2. Place a towel in-between the front and back layer of your shirt. This will protect that other side of the shirt. 3. Use a hairdryer on its hottest setting. Hold the hairdryer close to the design. The heat should cause the adhesive of the vinyl to become malleable which means that you can attempt to loosen it. Alternatively, you can also try using a wet towel on top of the design and then use a hot iron over the top, the steam should help to loosen the vinyl transfer. 4. Use tweezers and a sharp knife to gently loosen and scrape away the transfer. 5. Repeat the steps by applying more heat and scraping until all the transfer has come off. How to Remove Heat Transfer Vinyl from a Shirt [Step-by-Step] is republished from: The Best Vinyl Cutters Blog via WordPress https://cuttercraftsbysamantha.wordpress.com/2018/11/08/how-to-remove-heat-transfer-vinyl-from-a-shirt-step-by-step/ Creativity. I’m a creative person by nature and I love to get my hands dirty. What I don’t love as much is to clean up after the fun has ended. And I despise it, even more, when I have to clean up after the crafty activities with my 2-year-old. I love watching her explore her creative side … but man she can make a mess. So one day, I had what I like to think is a pretty brilliant idea. I took the craft outside. It was truly a very freeing experience for us both. I will briefly outdoor the activity below. I also whipped up a scrapbook layout of the fun we had, so please scroll to the bottom to check that out as well.
Fun Messy Outdoors Craft Activity for Toddlers
Materials Required:
Instructions:
I think these pictures of her having fun, says it all.
And as for my creativity? Well as fate would have it, her enjoyment and excitement of this messy outdoors painting tired her out a bit. And within no time at all, she was having a nap. That meant that it was time for mummy to get creative. So I pulled out my scrapbooking supplies, my die cut machine, printed off these photos and got scrapping.
The Scrapbook Layout
The creative process inspired a bit of creativity with my own work. Here are some ideas of things to try with your next scrapbook layout:
Creativity is good for all of us, no matter what age we are. I love inspiring my daughter to be creative and to get outdoors as often as we can.
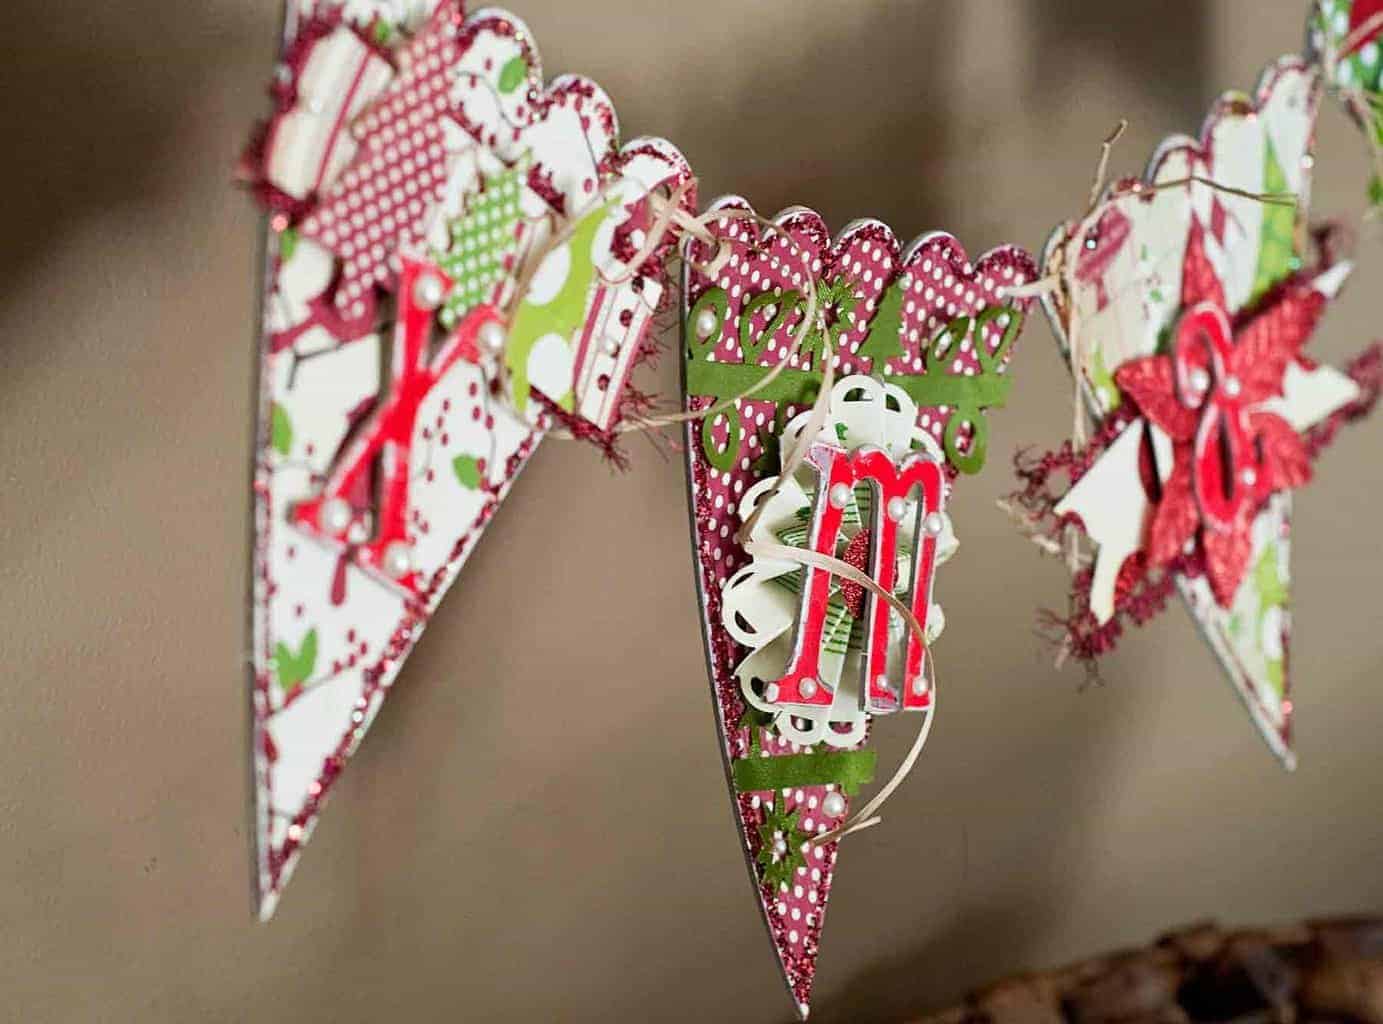
Leave me a comment: What great outdoors craft activities do you enjoy with your child? I would love to read about it. Fun Messy Outdoors Craft Activity for Toddlers was first seen on: https://www.thebestvinylcutters.com via WordPress https://cuttercraftsbysamantha.wordpress.com/2018/11/04/fun-messy-outdoors-craft-activity-for-toddlers/ November is here and I bet you are all starting to count down towards that beautiful Christmas day! Here in my house, Christmas crafts are all-go and Christmas papers and embellishments are spilling over my craft table. Just yesterday I decided to start decorating my home a bit, so that life can feel a bit more festive. We will be away for Christmas this year, so I might just as well start decorating early so that I can enjoy the house all pretty in the festive spirit.
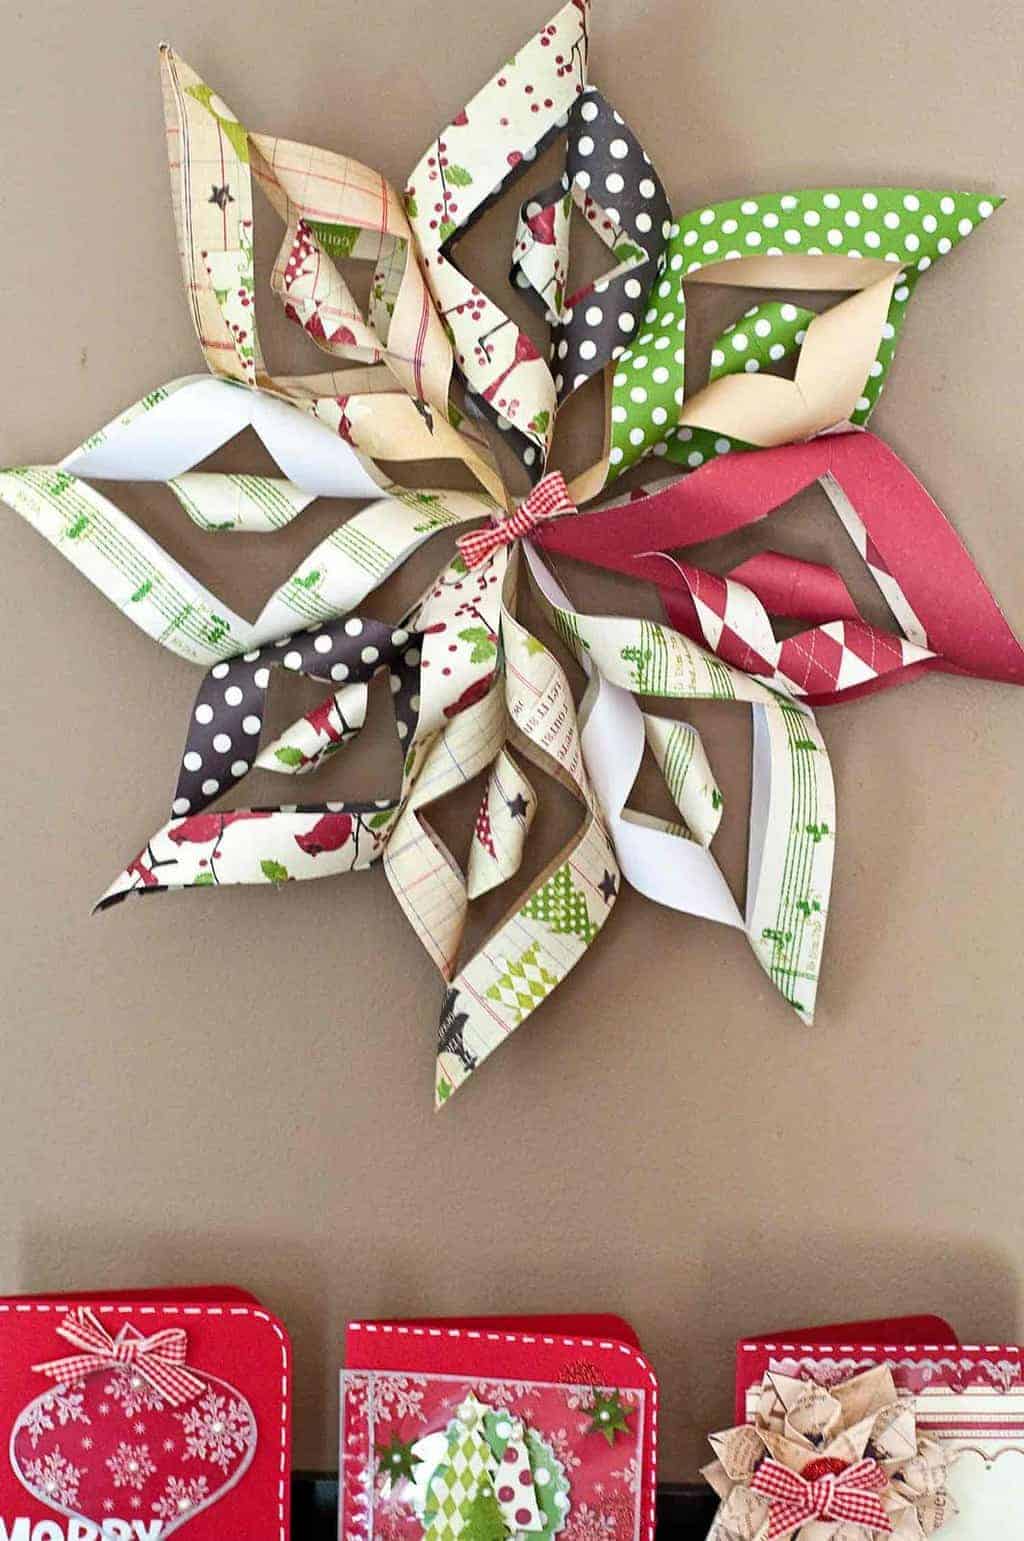
So today I wanted to share with you a lovely DIY Christmas Paper Star decoration. I can promise you that these are slightly painful to make, but hey, I think that the finishing result definitely pays off for the repetitious work you will have to do. So let’s hop right into the tutorial, shall we? I found a great video tutorial that I added to the bottom of the post as well.
3D Paper Christmas StarMaterials Required:
DIY Christmas Star Step-by-Step Instructions:
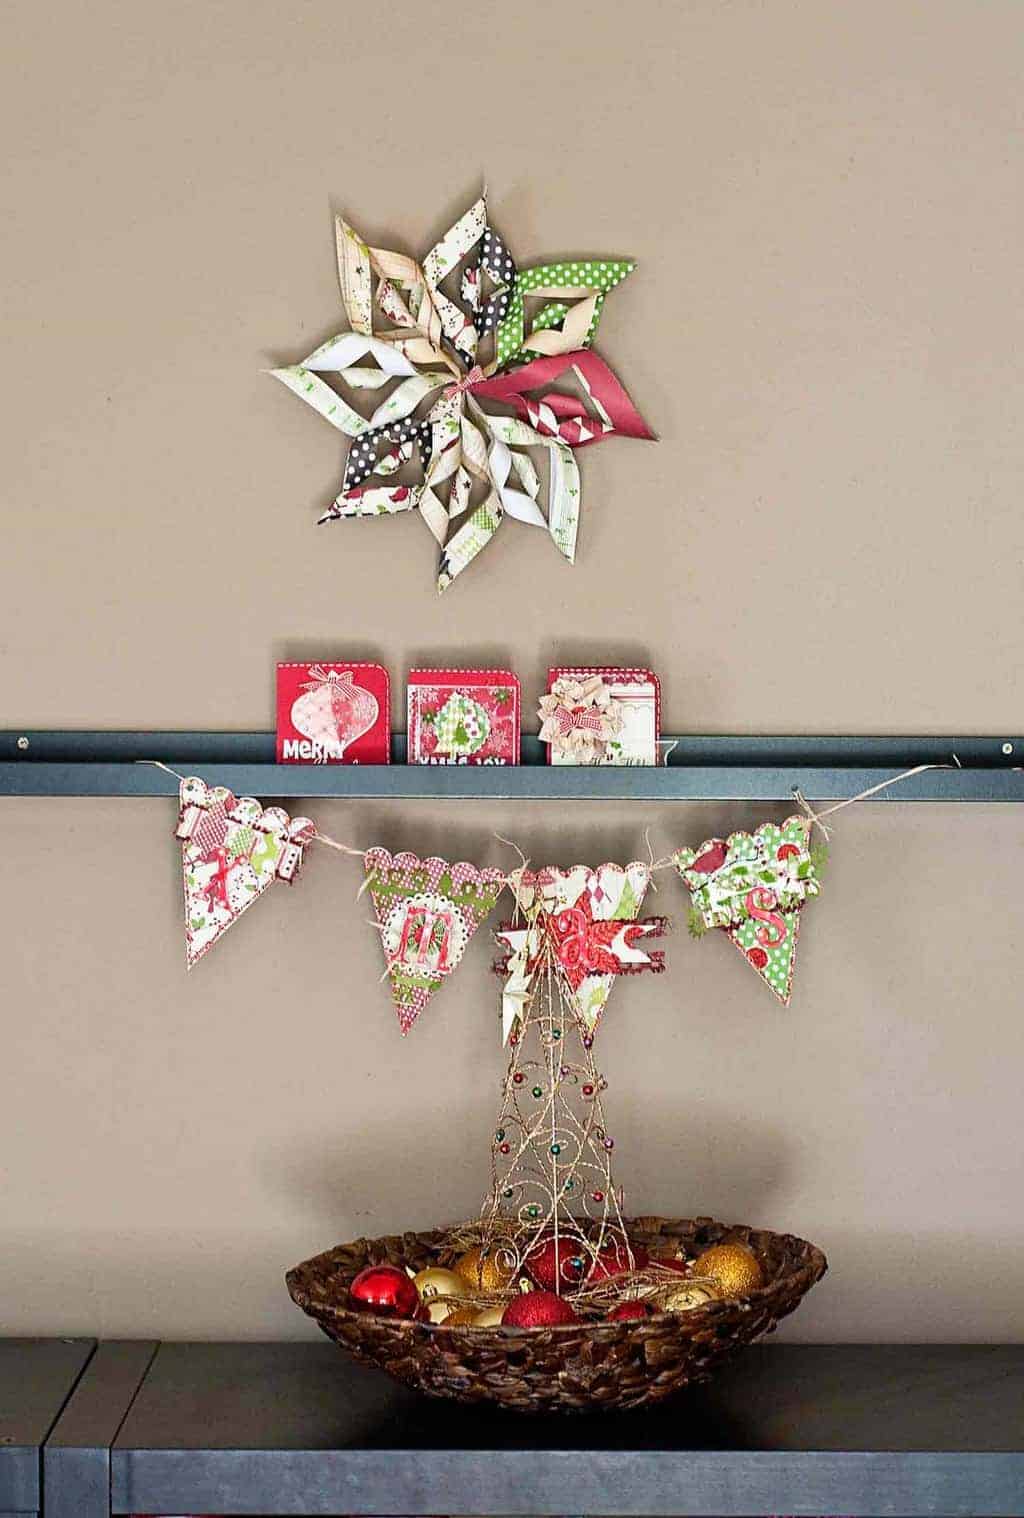
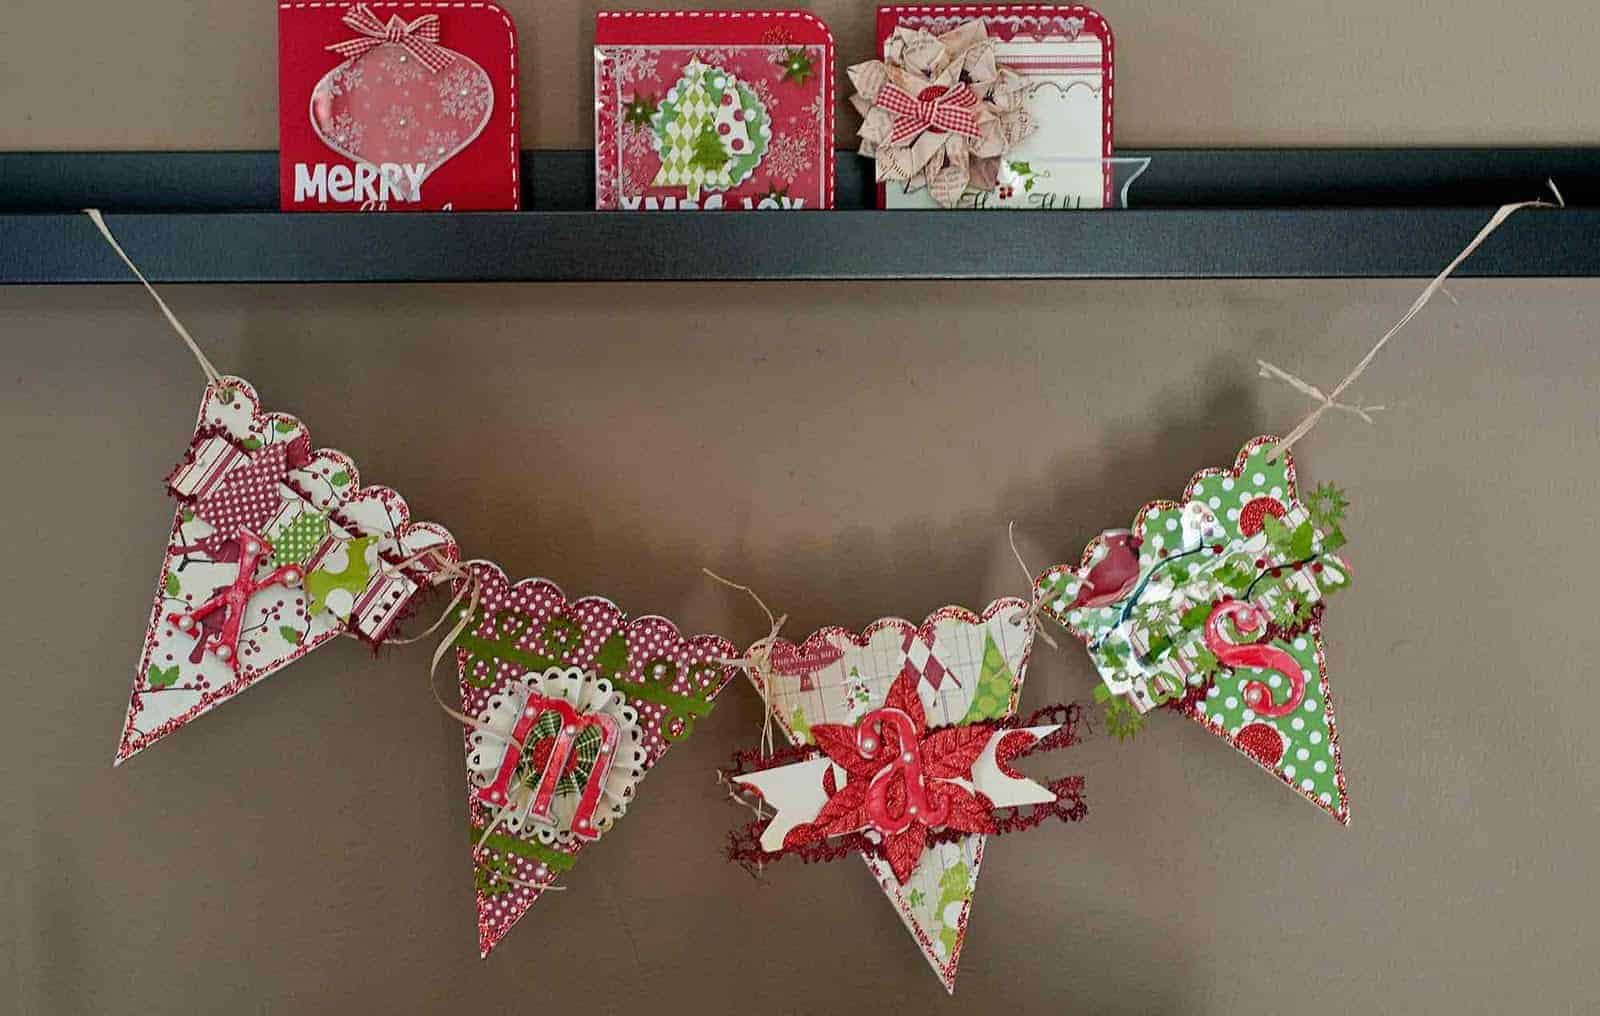
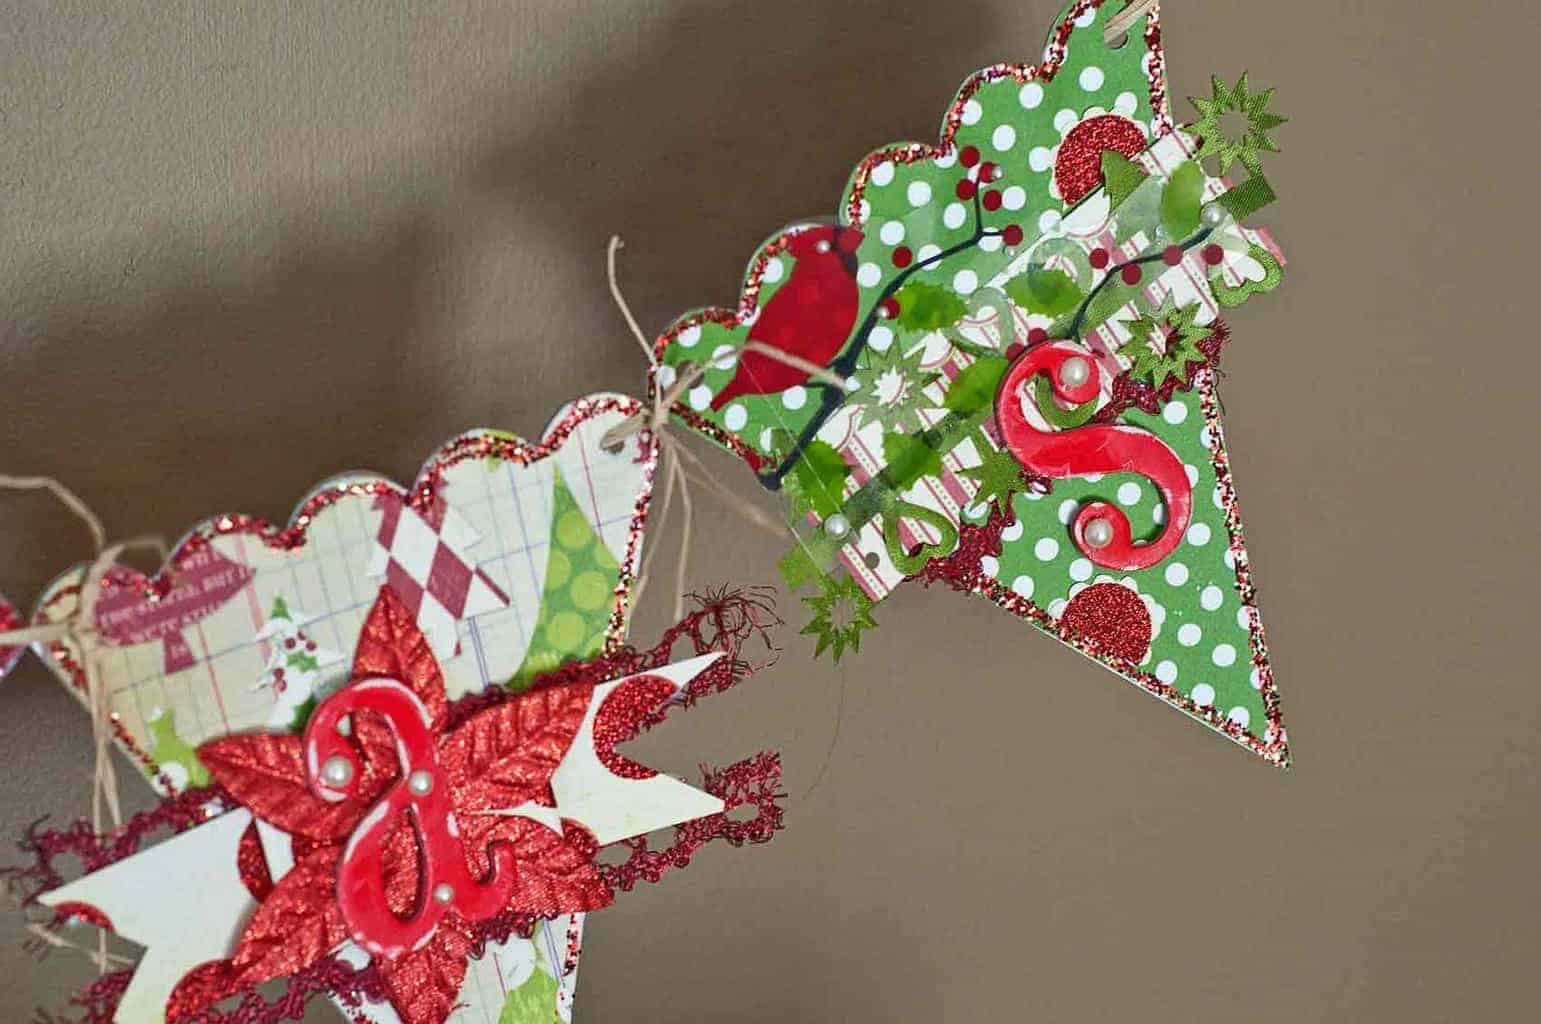
Video Instructions of the DIY Christmas Paper StarI wanted to use my star as a prominent decor piece on the wall as you enter my home. So I simply used some blue-tac and stuck it right onto my wall. Underneath that, I have an IKEA frame shelf, which I emptied and filled up with some homemade Christmas cards. And underneath that, I simply hung a Christmas banner that I created with my scrapbook goodies. This is the end result – I’m loving it!
To save some time, you can always use your die cutting machine to cut out your squares for you – especially if you are planning on making more than one of these stars. A die cutting machine is really handy if you want to cut out some chipboard flags for your banner as well.
Leave me a comment:
Step-by-Step Tutorial: DIY 3D Paper Christmas Star was originally published to: https://www.thebestvinylcutters.com via WordPress https://cuttercraftsbysamantha.wordpress.com/2018/11/04/step-by-step-tutorial-diy-3d-paper-christmas-star/ We are BIG BIG fans of Bundle Deals. Bundle deals typically always help you to save a lot of money. In fact we love bundles so much that we want to dedicate a whole post to one of our favorites.
The Cricut Explore Air 2 Heat Transfer & Vinyl Bundle
The Cricut Explore Air 2 Vinyl Bundle is a perfect starter bundle for those who want to create with vinyl. This bundle is one of the most popular sellers on Amazon and truly packs in massive value for a low price. What is Included in this Bundle?The stuff you get in the Explore Air 2 Machine-Only Box: Cricut Explore Air 2 Machine, 100+ free images, 50+ free project ideas, Getting started guide, Pen & cardstock sample, Cricut 12″ x 12″ cutting mat Additional items specifically for this bundle: 5 pack Cricut Color Candy Shop Pen, Cricut Tool Kit (Spatula, Scraper, Scissors, Sharp Hook Tool & Needle Point Tweezers), 8 sheets vinyl, 2 sheets transfer paper, 4 Sheets Glitter Heat Transfer Sheets, 12 exclusive vinyl designs with project inspiration & technique digital book, 12 exclusive heat transfer vinyl designs & project inspiration & technique digital book.
But what exactly can you do with all those extra goodies? Well here is our list of fabulous vinyl project ideas that you can try out with your Cricut Explore Air 2 Glitter Vinyl Bundle.
Cricut Explore Air 2 Glitter Vinyl Bundle Project IdeasWe wanted to round up some beautiful inspirational glitter vinyl ideas from around the web, to show you what you can make with this fabulous bundle.
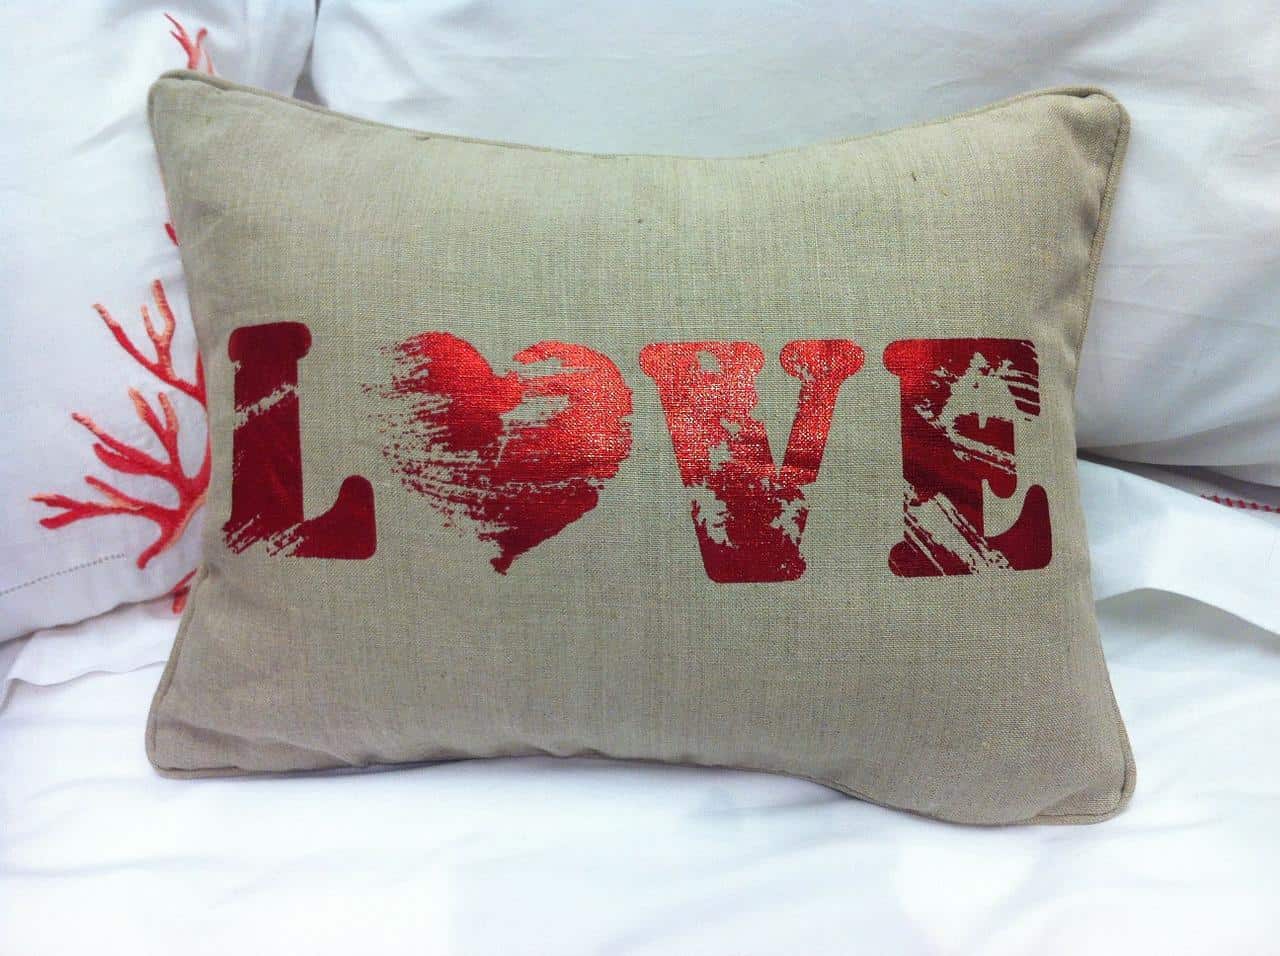
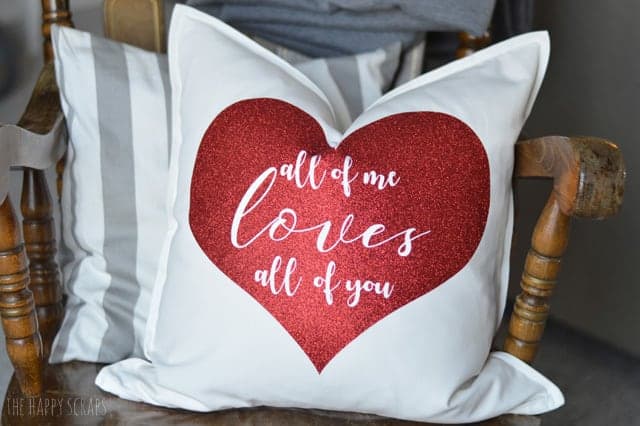
1. Glitter Throw Pillow Transfer
Amy from The Happy Scraps shows us how to whip up this stunning glitter heart pillow. She uses an Explore Air 2 Machine together with some red glitter vinyl and within a short time, she has a statement piece for her bed or lounge. Absolutely loving it!
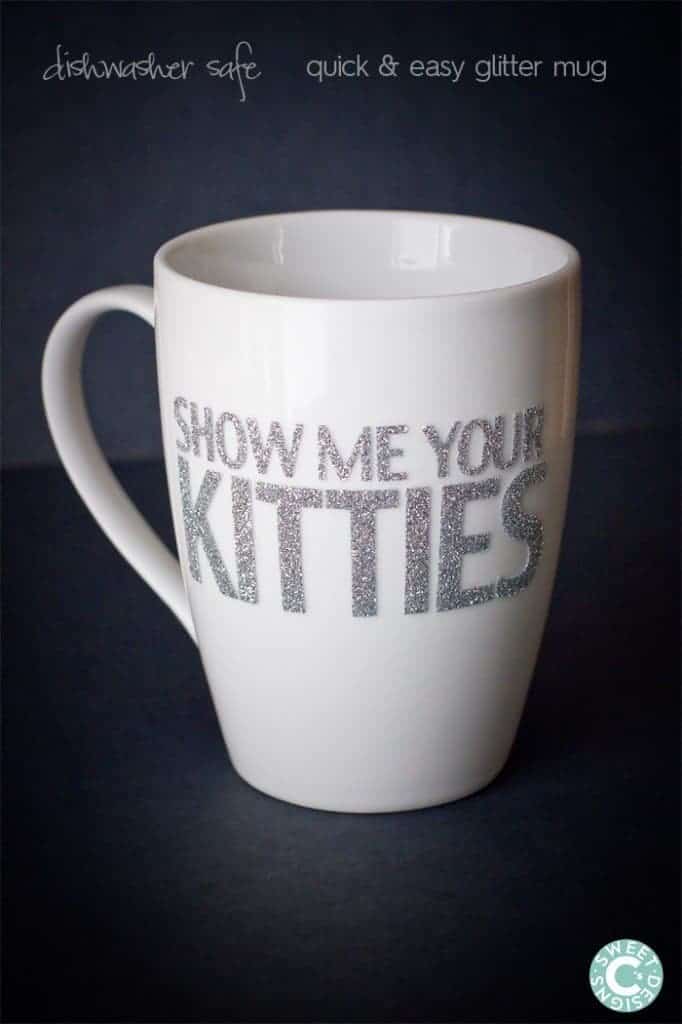
2. Dishwasher Safe Glitter Mug
Courtney has done an amazing done with this elegant and cute glitter mug! Not only is the mug dishwasher-safe, but she also managed to use a normal house iron to iron the glitter vinyl onto the mug – holy moly!! Hop over to her blog: Sweet C’s Designs, to find the full tutorial!
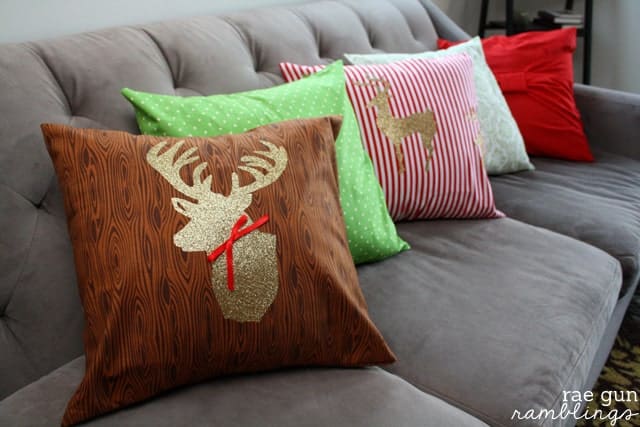
3. Glitter Pillow Case
I totally adore these deer glitter throw pillow accents. I love it even more against the ‘wood grain’ fabric – total statement piece. Marissa shares her step-by-step instructions for these throw pillows on her blog: Rae Gun Ramblings.
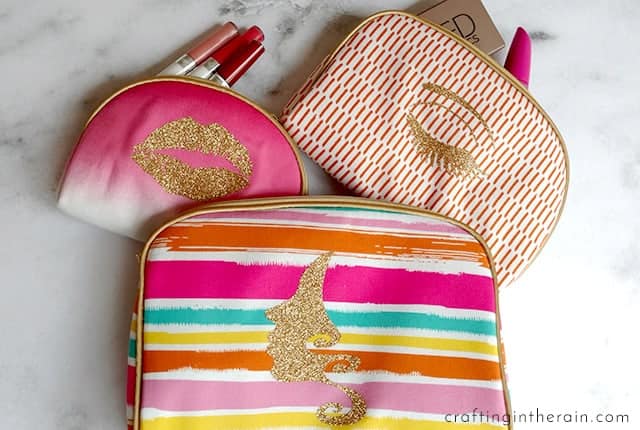
4. Glitter Makeup Bags
These makeup bags are simply the cutest. I love the colors and I love the glitter accents. Stephanie from Crafting in the Rain shares a full tutorial to show you how easy they are to whip up. They would make brilliant gifts as well!
5. Custom Glitter T-ShirtLiz from Liz on Call shares her tutorial to show you how you can use glitter transfer to create some custom t-shirts! Loving her glittery black Disney themed transfer.
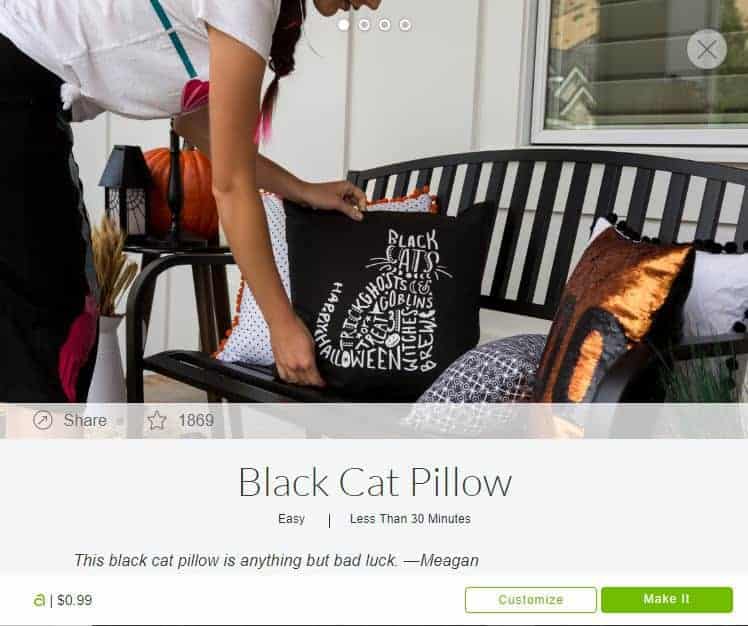
Cricut Explore Air 2 Glitter Vinyl Bundle Deal Project Ideas is courtesy of: The Best Vinyl Cutters Blog via WordPress https://cuttercraftsbysamantha.wordpress.com/2018/10/31/cricut-explore-air-2-glitter-vinyl-bundle-deal-project-ideas/ The new EasyPress 2 has been released and we often get asked whether this press from Cricut is worth the $$$. To answer this question, we thought it might be worthwhile to have a look at what you can make with this press. Why not try making some personalized bags, home decor, apron’s, tea towels or throw pillows. The possibilities are endless. We love the versatility of the EasyPress 2 and we love that the heat press comes in a small size that is easy to carry around as well as easy to store. Perfect for those of us who enjoy working on a variety of crafts. If you are thinking about getting this heat press, here are some posts that will help you out: And in the meantime, here is our list of fabulous Cricut EasyPress 2 Project Ideas that will provide you will loads of inspiration:
Cricut EasyPress 2 Project IdeasWe wanted to round up some beautiful inspirational EasyPress 2 crafts from around the web, to show you what you can make with this fabulous heat press machine. 1. Make Your Own Wall Sign
Amy from The Happy Scraps shows us how to quickly whip up a super elegant sign. I love this personalized fashion wall piece. Hop over to see her great tutorial as she walks you through the steps of using an EasyPress 2 to adhere some vinyl straight onto wood. Please note, she also used a Cricut Maker to cut out her letters. You can read through our Cricut Maker review here.
2. Create Your Own Custom Printed Napkins
We are loving these adorable personalized napkins from Lindsay. You will find the full tutorial on how to whip up these gorgeous babies on her blog: See Lindsay. You will also need a vinyl cutter to cut out the letters (see our vinyl cutting guide here).
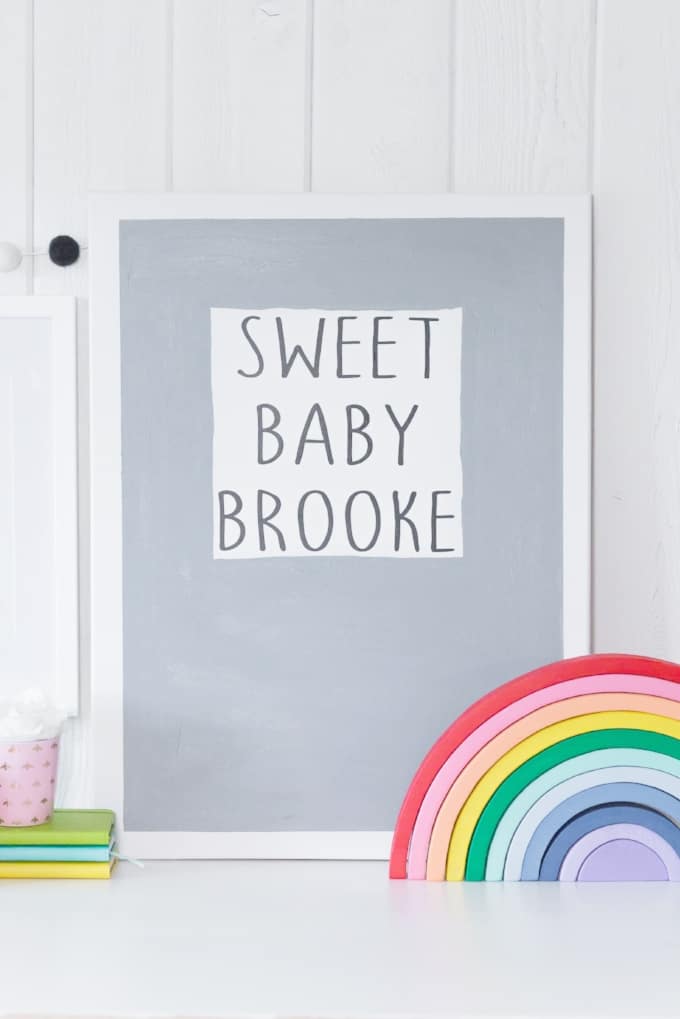
3. Create Your Own Wall Decor
Beth from Kingston Crafts says that she loves gifting personalized gifts for little ones. So she whipped up this incredibly sweet statement piece for a baby’s room. Super easy to make. Hop over to Beth’s blog to see a full tutorial as well as a material list.
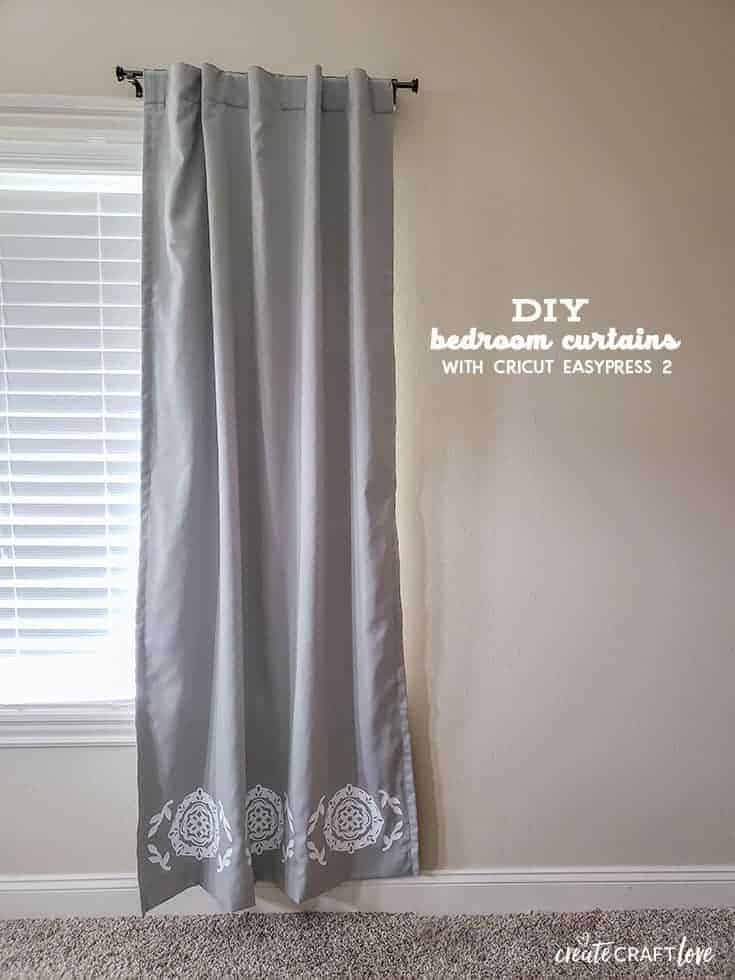
4. DIY Bedroom Curtains
Jill from Create Craft Love takes boring curtains and turns them into showstoppers. I absolutely love the design she has chosen for her curtains. The white against the grey is elegant, simple but powerful. You can visit her blog as she shows you how to whip up these DIY curtains. She also shares some nifty tricks on how to week intricate designs with a Cricut BrightPad.
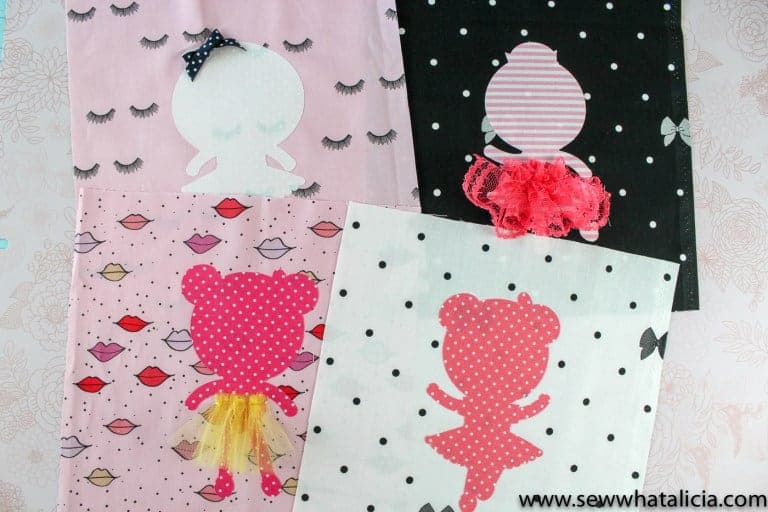
5. Easy Quilt Blocks
These super sweet quilting blocks would make sure a cute quilt for any girl’s room. Alicia from Sew What Alicia shows you how to use some fabric, an EasyPress, and a sewing machine to create these adorable blocks. Easily adaptable if you have a boy in your family.
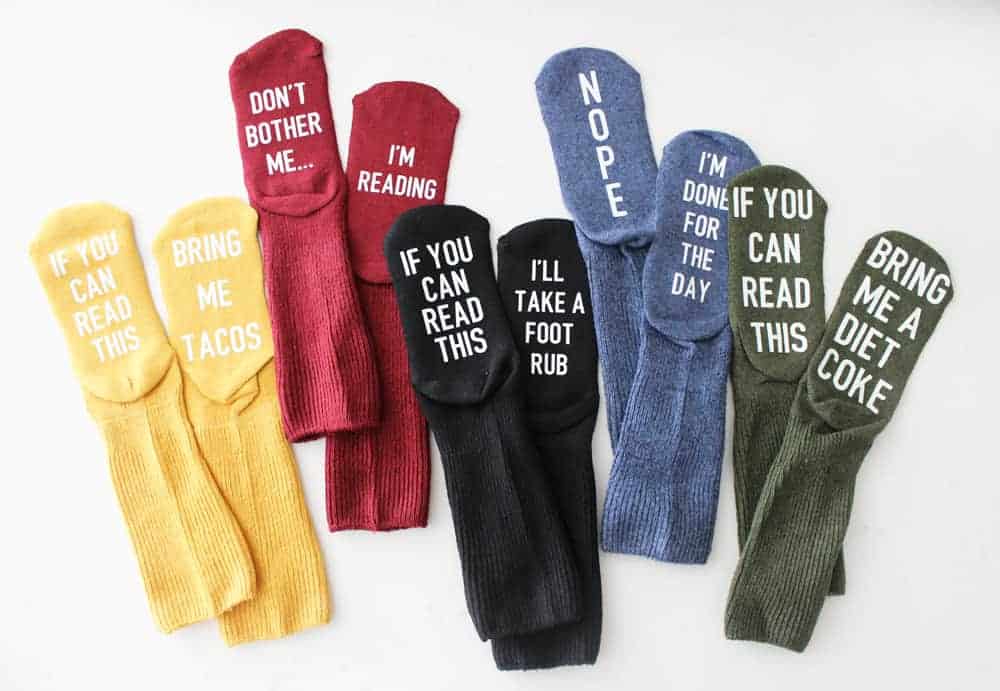
6. DIY Funny Socks
These gifts are the best! They are great for birthdays, teacher’s gifts, father’s day and of course Christmas. Jessica from Pretty Providence shows you how you can easily and quickly whip up some DIY funny socks.
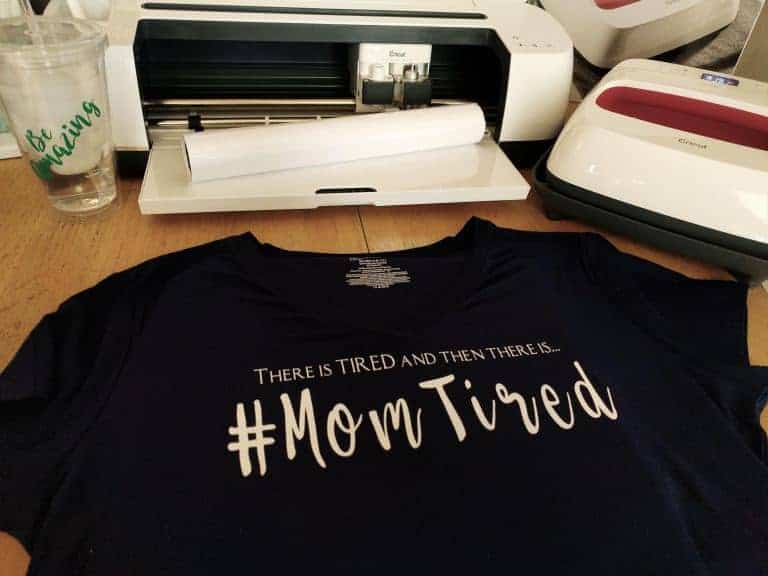
7. DIY #MomTired Shirt
As a mom, I can totally relate to this shirt! Want to make your own DIY transfer shirt? Hop over to The Quiet Grove where Julia will walk you through the steps.
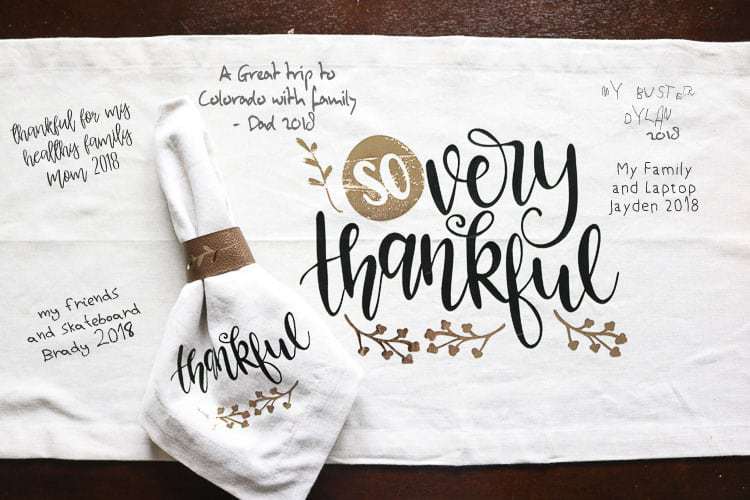
8. DIY Table Runner
I love the idea of creating themed table runners for special occasions. Cheryl from That’s What Che Said shows us how to whip up this gorgeous Thanksgiving Table Runner. Isn’t it beautiful!
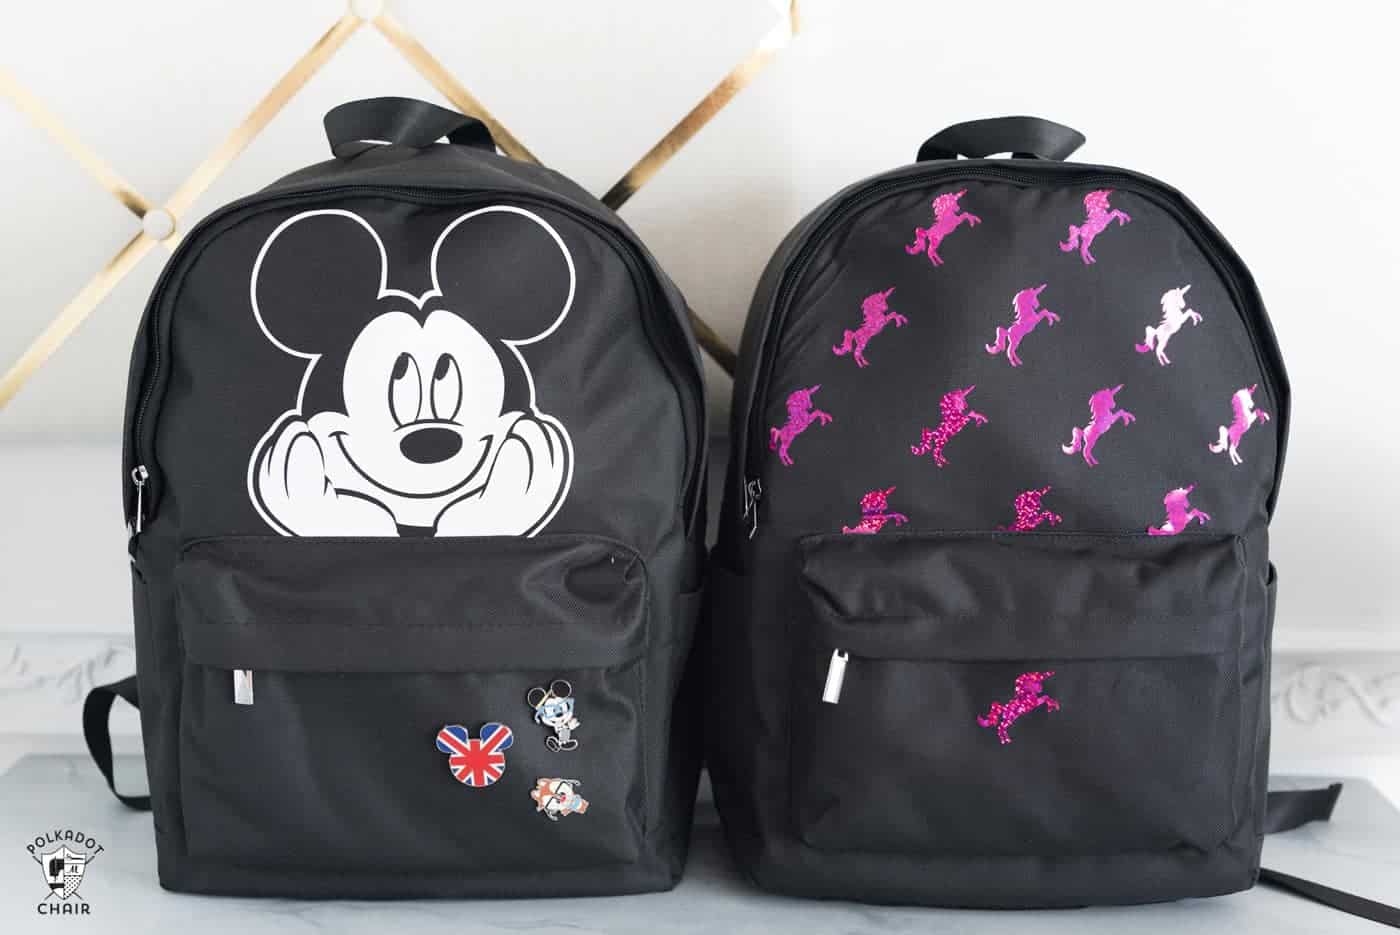
9. DIY Custom Backpack
This is such a brilliant idea! What a great way to personalize backpacks, great for school-aged kids, but also great for those of us who love to travel. Melissa from Polka Dot Chair, shows you how to customize these bags. Hop over and have a read, as her tips might save you a lot of headaches!
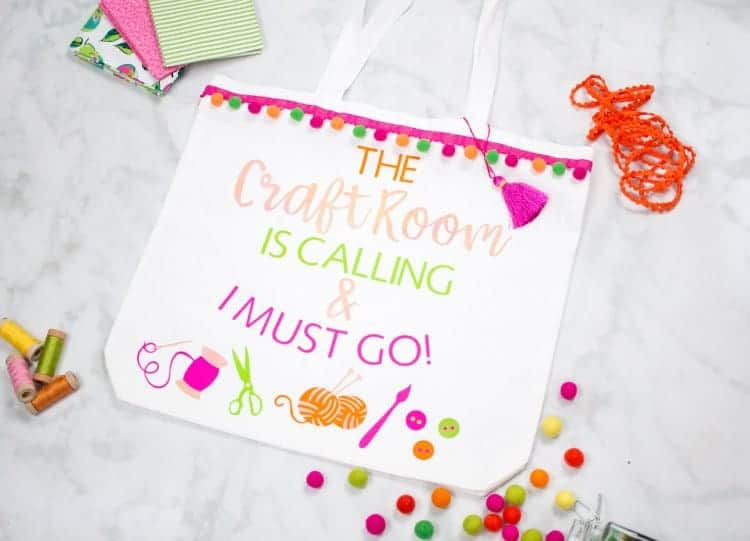
10. DIY Craft Bag
Our last share for today is from Kimberley. Hop over to her blog: Sweet Red Poppy, to find the tutorial that will help you whip up this gorgeous craft bag. We all have too much craft stuff, so these bags will come in so handy when you go over to a friend’s house to create.
The following blog post 10 Inspirational Cricut EasyPress 2 Project Ideas to Try! was first published to: thebestvinylcutters.com via WordPress https://cuttercraftsbysamantha.wordpress.com/2018/10/31/10-inspirational-cricut-easypress-2-project-ideas-to-try/ |

Hi, I’m Sam! I’ll be honest, I’m a total vinyl cutter addict! I could easily lose myself in a day filled with vinyl cutting projects! I have a whole career based on working with vinyl cutting machines! I worked with smaller vinyl cutters in a papercraft wholesale distribution warehouse. Later I coached those who were interested in turning their cutting crafts into small businesses. I have used all the machines that I recommend and have personal experience with both the positive and the negatives of each of these machines! I hope you find all the answers you are looking for, right here on my site! My Profiles
|


 Mat- Sewing Kit – Washable Fabric Pen


 RSS Feed
